The MATE X is a folding electric bicycle. It was made possible in June 2017 by Christian Adel Michael and Julie Kronstrøm from Copenhagen, Denmark. This was the second Indiegogo campaign they successfully funded. The first campaign was the original MATE folding ebike.
Campaign started: 1st May 2018
Campaign published: 16th July 2018
Campaign concluded: 23rd July 201815th August 201814th September 201822nd September 201828nd September 2018 26th April 2019
First big shipment: May/June 2019, majority July/August 2019, last shipment September 2019
There are three different models of the MATE X, the 250, 250+ and 750. A set of accessories can also be added to the bike when placing an order.
There are two set of different bikes, due to the new APAC enforcement meaning that the bikes heading for EU (and all later orders) had to be manufactured outside of China. That meant that the majority of the bike components had to be made or sourced in Taiwan instead, making it a different bike than what was promised initial on Indiegogo and after the first batch of orders (all orders delivered after June 2019). The Chinese manufactured bikes made up until then were shipped to non-APAC countries.
MATE X 250
MATE X 250 (45001): 250W, 48V 11Ah
250W high performance hub motor
48V 11Ah Lithium-ion battery
55km range
32km/h max. top speed
8-speed gear
20-inch fat tires
Computer dashboard
Front and rear suspension
2 year warranty
Retail price 2199USD
Indiegogo price 799USD
Shipping 200USD
MATE X 250+
MATE X 250+ (45002): 250W, 48V 14.5Ah
MATE X 250+ (45003) w/Boosted upgrade: 250W, 48V 17.5Ah
250W high performance hub motor
48V 14Ah Lithium-ion battery
80km range
32km/h max. top speed
8-speed gear
20-inch fat tires
Computer dashboard
Front and rear suspension
2 year warranty
Retail price 2399USD
Indiegogo price 899USD
Shipping 200USD
MATE X 750S
MATE X 750S (55001): 750W, 48V 14.5Ah
MATE X 750S (55002) w/Boosted upgrade: 750W, 48V 17.5Ah
750W high performance hub motor
48V 14Ah Lithium-ion battery
80km range
48km/h max. top speed
8-speed gear
20-inch fat tires
Computer dashboard
Thumb throttle
Front and rear suspension
2 year warranty
Retail price 2699USD
Indiegogo price 999USD
Shipping 200USD
Perks and accessories
Tektro Hydraulic Disc Brakes (129USD)
Flashy color display (99USD)
Custom MATE metal fenders (49USD)
Thumb throttle (49USD)
BOOSTED battery 17,5Ah (99USD)
Limited Edition UNICORN Finish (49USD)
Rear-rack with brake-lights (99USD)
EXTRA high-speed charger (79USD)
EXTRA BOOSTED 17,5Ah Battery (429USD)
Spare set of tires incl. tubes (49USD)
JOKER Light Set (front+rear) (49USD)
JET GREY Color (29USD)
IMPERIAL WOODLAND Color pattern (99USD)
Recommended accessories to get:
Hydraulic disc brakes
Flashy color display
Rear rack
Front and rear fenders - at the moment, these are flimsy
DNM AOY-36RC Air Rear Shock, 165x35mm length hole-to-hole / travel, 24x8mm eyelet diameter, adjust to 50 psi on lower and 110 psi on upper chamber - when rider is over 90 kg, and for better off-road performance - Get on AliexpressGet on EbayGet on Amazon
CaneCreek DB Air IL BAD2060, 165x38mm length hole-to-hole / travel, 24x8mm bushing [16][17] - Get on Ebay
Recon FAT bike 20-inch air suspension fork - Get on Ebay
HIMALO Air Shock Locking Suspension Aluminium 4-inch 135mm - Get on Aliexpress
KRSEC 26x4.0" Fat Bike Air Suspension Fork - Get on Ebay
Chain ring:
LitePro 58T BCD 130mm black aluminium front chain ring with guard flange - for lower cadence/peddle comfortably on high speed on assistant level 5 and over, no need to change/extend chain Get on EbayGet on Amazon
Opbsite Aluminum Chainring 58T Black - Get on Amazon
Freewheel cogsets:
DNP Epoch 11-34T or 11-32T 8-Speed freewheel - wider gear-ratio for high speed peddle on assistant level 5 and over, while still retaining good low speed cadence - Get on AliexpressGet on EbayGet on Amazon
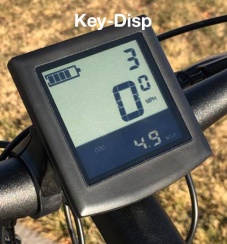
Enter the settings by double-tapping the "M"-button on Ukriver display or "Power"-button on the Bafang display, or hold both "+" and "-"-buttons for two seconds for the black/white Key-Disp display.
All of these settings are available on the Bafang color display but only a limited set is available on the Ukriver color display and Key-Disp black/white display.
Optimal controller settings:
Display settings:
Language: English
System: Imperial - for km/h
Brightness: 5
Auto off: 5 minutes - power down the bike after idle period
Scenes: Digital - the theme of the display layout
Battery indicator: Voltage - easier to determine battery state, Bafang displays percentage only in 20%/five steps
Ranges from 54.6V when full, down to 41.6V when empty, but always charge at around, or before, 44V
Power indicator: Digital - shows instantaneous wattage
Clock: Set the date and time
Start password: Prompted for your password when you power on the bike
Basic settings:
System voltage: 48V - the type of battery drive system used
Wheel size: 24-inch - even though the real wheel size is 20-inch, gives a more accurate speed indication on the display, can also be input in measured cm
USB port: On - USB-port beneath the display
Information: shows max./avg. speeds and ODO meter
Advanced settings:
Go to the "Advanced settings" menu-option and enter the following pin code.
Enter pin code:
Ukriver display: 1801
Bafang display: 1919
Speed limit - max. speed before controller/motor stops assisting
250: 25 km/h default/EU
750S: 32 km/h default
Max. value: 99 km/h (Bafang) 52 km/h (Ukriver) 39 km/h (Key-Disp)
Unlocks Ludacris mode for ~35mph / ~56kmh max. real speed - does not void warranty anymore
Unlocks hidden assistant level 10 - turbo mode
Current limit - maximum current through controller during acceleration and climbing steep gradients
Default: 18A (48x18=864Watt)
Boost performance: 20A (48x20=960Watt)
Max. controller current: 25A (48x25=1200Watt) - short bursts only, could overheat motor coil - Bafang 50A max. value, Ukriver 30A max. value
Poles in motor: 1 - magnetic poles inside the motor, used to calculate the speed indicator
Start poles: 1 - number of poles (speed sensor) needed to be detected by controller before starting the motor
Clockwise start: Yes - speed sensor turn direction, "Yes" means forward looking from right-side of bike
Throttle 6km: No - "Yes" turns walk-mode ON while twisting throttle
Throttle level: No - "Yes" limits the top throttle speed to match the assist level
Start mode: ECO - Power/ECO/Standard, sets the maximum current curve when starting riding/accelerating, limited current with ECO
Assist levels: 9 - 3/5/9, how gradual/number of steps the levels should be
Assist setting: Further adjust each assist level, all default to 0
Configuration presets
A few presets depending on your preferences. Note that there is no way to turn off the motor cut-off after you stop pedaling, use the brake levers instead to cut the motor.
Default
The default riding configuration is meant to conform to the EU and regional speed regulations.
Speed limit:
250: 25km/h
750S: 32km/h
Current limit:
250: 10A (546W peak) / 15A (819W peak)
750S: 18A (983W peak)
Assist levels: 9
Level while riding: 3 to 5
Smooth and quick
For gradual acceleration and great top speed. Suitable for stop-and-go city riding and road riding/commuting. Unsuitable for hilly rides, as the top speed will be low because of the current limit. Using stock 53T front chainring.
Speed limit
250: 35km/h
750S: 35km/h
Current limit:
250: 12A (655W peak)
750S: 12A (655W peak)
Assist levels: 10 - "Ludacris" turbo-mode enabled, but not needed
Level while riding: 2 (10 km/h) to 7 (35 km/h)
Smooth and rapid (new chainring)
Same gradual acceleration but higher speeds when using the 58T chainring upgrade part for improved pedaling.
Speed limit - black/white display bound to 39km/h
250: 45km/h
750S: 45km/h
Current limit:
250: 12A (655W peak)
750S: 12A (655W peak)
Assist levels: 10 - "Ludacris" turbo-mode enabled, but not needed
Level while riding: 2 (10 km/h) to 8 (45 km/h)
Hill climber and quick
For great hill climbing ability and fast flats without too jumpy acceleration.
Speed limit
250: 35km/h
750S: 35km/h
Current limit:
250: 16A (874W peak)
750S: 16A (874W peak)
Assist levels: 10 - "Ludacris" turbo-mode enabled, but not needed
Level while riding: 2 (10 km/h) to 7 (35 km/h)
Responsive and fast
For max. acceleration and highest speed. On circuits or racing stretches. This introduced jumpy acceleration. Short periods only, overheating will become an issue.
Speed limit - black/white display bound to 39km/h
250: 52km/h
750S: 52km/h
Current limit:
250: 18A (983W peak) - motor max.
750S: 25A (1365W peak) - controller and motor max.
Assist levels: 10 - "Ludacris" turbo-mode enabled
Level while riding: 10 (46-52 km/h)
Usage
For daily use, assist level 5 or 6 is a good combination of speed and battery capacity conservation
View current, average and max. speed, press "M"/"i"-button multiple times
View ODO, trip time and trip distance, press "Power"-button multiple times
Enter configuration menu, double tap "M"/"i"-button
Walk assistant up hills, set assist level 0 and hold "-" for "P" to appear on the display and it will begin to roll, release to stop
Charge via the USB-port at 5V 0.5A (2.5W), press and hold the "M"/"i"-button for a USB-icon to appear, stays on until power-off
Turn on the lights, press and hold "+"-button, same to turn off
Reset average speed, max speed, trip distance and trip time, press "+" and "-" at the same time
On steep hill climbs or starts, it is curial to assist the motor as subjecting the motor to unnecessary load can cause the controller to blow/overheat
Ranges from 54.6V when full, down to 41.6V when empty, but always charge at around, or before, 44V
For the smoothest ride, set current to 12A and max. speed to 52km/h
Re-pressurize the tires every few weeks, as fat bike tubes naturally deflates faster
Guides
Initial setup
Insert the seat stem and adjust the lock bracket
Mount the handlebar and lock it in place
Install the front wheel and insert the lever
Screw in place the pedals
Put the reflectors on the wheels
Install the fenders and rear rack (if acquired)
Attach the front lights and remove the left handle bar grip to install the horn/turning-inducator (if acquired)
Adjust to get a flat saddle
Adjust the handle bar height and level with the lever
Inflate the tires to 20-25 psi, 1.4 to 1.6 bar - check often
Charge the battery by plugging the wall socket first, then charger plug
Press and hold power button and configure the bike computer, double tap "M"-button
Charging procedure
Park bike securely
Turn off bike by holding power button on left handle
Either take out the battery, or leave it in the bike
Plug in charger into wall socket/mains
Insert the other charger lead into the battery
Wait for the charge to complete, max. 4h for 4A charger, max. 8h for 2A charger
Unplug lead from bike then from wall socket
Power on bike by holding the power button
Verify battery state of charge by looking at the battery indicator on the display
Connect front and rear lights, horn
Open the harness under the frame where the MATE-logo is placed
Find the yellow 3-pin connector for the integrated front-light/horn
Open the controller compartment to find the black 6-pin connector for the rear-light/turning-light/horn-switch
The 6-pin black cable connects to the supplied Y-split cable where the rear-light/turning-light is connected to one end, and the horn-switch to the other
Mount the front light, rear light, and handlebar switch accordingly, route the new cables inside the cable wrap on the bike
Tighten and secure bike
Tighten the two kick-stand screws
Fasten the steering folding-stem screw to the headset just enough so it is hard to fold the handle in place
Inside the folding-stem, tighten the 12mm top-screw
Secure the handlebar height clamp-screw so it is hard to unfold the handle by accident
Go over all the screws on the handlebar for the brake-levers, display and hand-grips
Adjust the seat-post clamp-screw for a tight secure fit
Adjust the main frame-lock handle screw located on the bottom hinge when the lock is open, adjust from bottom side for a secure lock
Tighten the screws holding the brake calibers to the frame
Remove tire from rim
Gear down to the 8th-gear
Unplug the rear wheel-cable
Unscrew the kick-stand
Remove silver bolts and washer holding the axel
Bend back the rear derailleur
Then lift the wheel out
Deflate tire and use a plastic spudger to lift the tire bead off
Push in the valve and carefully remove inner tube
Lift the tire off the rim
Brake sensor sensitivity
If the brake handle keeps cutting off the motor, decrease the sensor sensitivity - essentially moving the reed-sensor further away from the built-in magnet (also related to brake error 25)
On the under-side of the brake handle, loosen the small 2mm hex bolt slightly
Adjust the 7mm nut with a wrench, do a half-turn at a time and try the bike
Turn it counter-clockwise/out to decrease the sensitivity
Turn it clockwise to increase the sensitivity
Tighten the 2mm hex bolt again
Modifying front suspension fork
A normal fat bike 20- or 26-inch front suspension will fit, only the normal procedure of shortening of the stem is required