Lumenier QAV250 Setup: Difference between revisions
No edit summary |
|||
| Line 29: | Line 29: | ||
* Exposure: | * Exposure: | ||
** '''Shutter speed: Auto''' (Auto) | ** '''Shutter speed: Auto''' (Auto) | ||
** '''Brightness: 065''' (042) | ** '''Brightness: 065''' (042) - range seems to be 25 to 65 | ||
** '''AGC: Off''' (Middle) | ** '''AGC: Off''' (Middle) | ||
** '''DWDR: On''' (Off) - Most important | ** '''DWDR: On''' (Off) - Most important | ||
| Line 39: | Line 39: | ||
*** '''Level: 80''' (22) | *** '''Level: 80''' (22) | ||
** '''Contrast: 110''' (149) | ** '''Contrast: 110''' (149) | ||
** '''Sharpness: | ** '''Sharpness: 023''' (026) | ||
** '''Display: LCD''' (CRT) | ** '''Display: LCD''' (CRT) | ||
*** '''Gamma: 0.45''' (LCD 0.45 CRT -) | *** '''Gamma: 0.45''' (LCD 0.45 CRT -) | ||
*** '''Ped level: 023''' (LCD 017 CRT 016) | *** '''Ped level: 023''' (LCD 017 CRT 016) | ||
*** '''Color gain: | *** '''Color gain: 210''' (LCD 176 CRT 160) | ||
This should give excellent piloting picture in any goggle or display. Perform fine-tuning at the flight location to lock-in the image quality even further. | This should give excellent piloting picture in any goggle or display. Perform fine-tuning at the flight location to lock-in the image quality even further. | ||
Revision as of 17:23, 30 April 2014
The following is my own QAV250 setup log/configuration.
OpenPilot Flight Controller
The CC3D and Naze32 Acro is at the time the best flight controllers for this platform. The CC3D is suggested by Lumenier and is used in this setup.
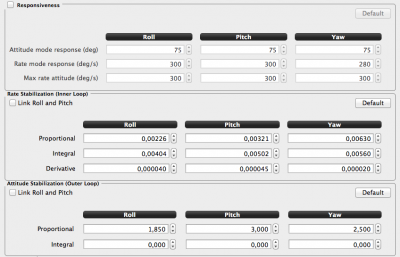
How to tune Kp:
- Set Ki for roll and pitch to 0.00300, put the responsiveness for rate mode response and max rate attitude to 300deg/sec for all
- Enable TxPID and put Kp roll and pitch on two sliders, set min. to 0.00100 and max. to 0.00500 - this pits the slider center to 0.00300
- Start flying in rate mode (pitch and roll), make quick stick movements and listen to how the controller stop when it has done the movement (counter adjust to stop it from getting away)
- If you you hear a quick double wrrh-wrrh, i.e. it overshoots/corrects, the rate is too high, lower and try again, the response should be precise with no sudden motor responses when it has hit the final position/angle
- Do the same for roll - on a H-quad the pitch rate is normally a little higher than the roll rate because of the weight distribution and delay in angular acceleration/momentum
PID settings:
FPV Pilot Camera
- CMQ-1993 600TVL camera with IR filter - vibrant colors
- 2.8 mm lens - nice balance between narrow and wide-angle view
The CMQ-1993 600TVL camera provides an excellent picture for a reasonable price (45USD). There are only a few settings needed to be changed to improve the picture quality. It renders colors great and it quickly adapts to changing light conditions. A detachable configuration/menu board is included.
Do a rest to defaults before setting the following options, mainly the brightness, contrast, sharpness and color levels using this setup guide pt1 and pt2, this guide or this.
Settings - value in (value) is the defaults:
- Exposure:
- Shutter speed: Auto (Auto)
- Brightness: 065 (042) - range seems to be 25 to 65
- AGC: Off (Middle)
- DWDR: On (Off) - Most important
- Level: 063 (063)
- White balance: ATW1 (ATW1)
- Day and night: Color (Auto)
- Image adjust:
- Lens Shade: On (Off)
- Level: 80 (22)
- Contrast: 110 (149)
- Sharpness: 023 (026)
- Display: LCD (CRT)
- Gamma: 0.45 (LCD 0.45 CRT -)
- Ped level: 023 (LCD 017 CRT 016)
- Color gain: 210 (LCD 176 CRT 160)
- Lens Shade: On (Off)
This should give excellent piloting picture in any goggle or display. Perform fine-tuning at the flight location to lock-in the image quality even further.
Mobius HD camera
The Mobius is an amazing value, the picture quality is something which is comparable to GoPro HD Hero cameras but at a very reasonable price.
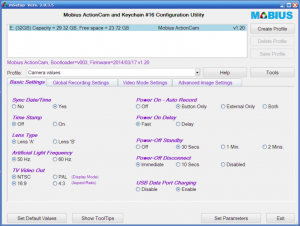
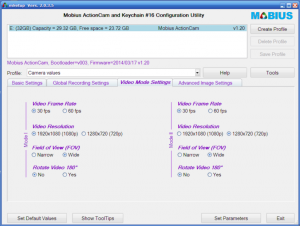
To configure the camera, either do it by hand by opening the SYSCFG.TXT file or get the Mobius Configuration application. To manually edit the file, enter the config mode by holding the Mode button, wait 1 sec, then also press the Power button, wait 10 sec and 3 red blinks, connect it to USB and a SYSCFG.TXT should be at the root of the drive.
Essential settings:
- Artificial light frequency: 50Hz in EU/AU, 60Hz in US
- Date stamp: Off
- Power-on auto record: On - less buttons to press
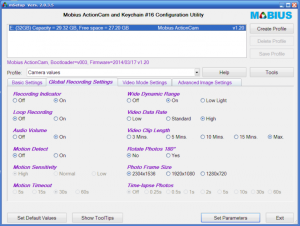
- Wide dynamic range: On
- Video data rate: High - 18MBit/s less artifacts
- Video clip length: Max. (4GB)
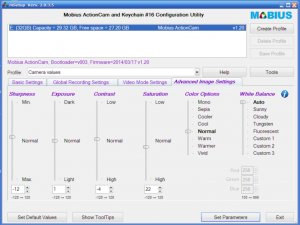
- Image settings:
- Sharpness: -12
- Exposure: 1 - makes a huge difference, only a single step
- Contrast: -4
- Saturation: 22
