TBS Discovery
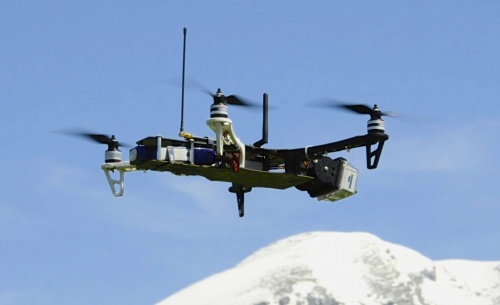
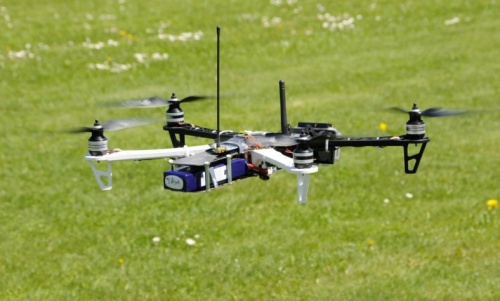
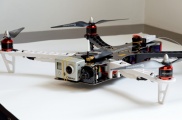
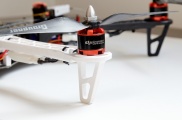
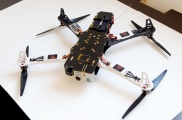
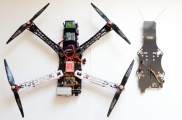
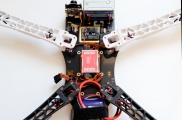
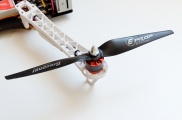
The Team BlackSheep (TBS) Discovery is a purpose made FPV platform based on the DJI Flame Wheel F450 frame base.
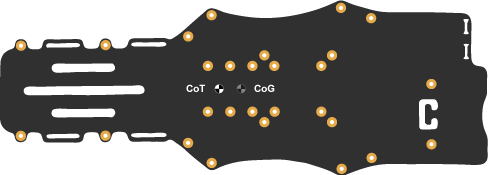
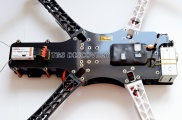
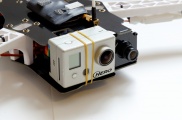
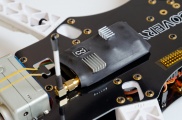
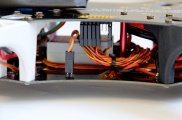
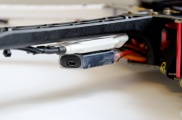
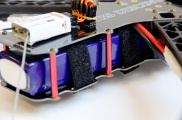
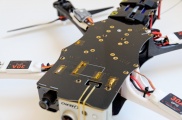
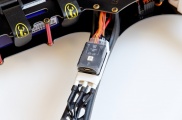
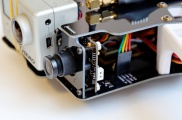
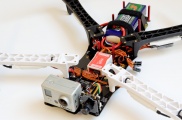
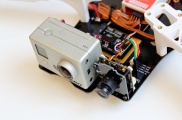
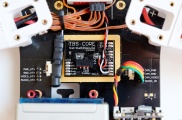
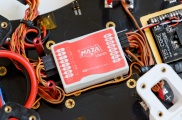
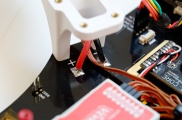
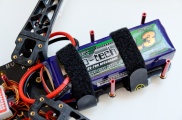
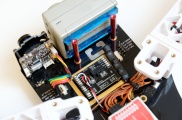
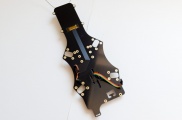
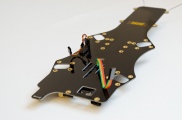
It has a asymmetric structure to offer a propeller free view, incorporates traces on the frame plates to minimize wiring, has space for both a flight camera and HD recording camera (GoPro) in the front and a protective cage for a high capacity LiPo battery in the back. There is also an on-board current sensor which is connected to an optional TBS CORE video- and power-controller.
Specifications
- Released:
- DJI Flame Wheel: November 2011
- TBS Discovery: June 2012
- Type: Spider quadrotor
- Airframe: Carbon fiber reinforced
- Absolute size: W461xH103xL328 mm - height inc. DJI motors
- Frame size: W116xH400xL328 mm - excl. arms
- Weight [1]:
- Frame only: 192 grams
- Frame with CORE: 198 grams
- Frame with arms: 414 grams
- Takeoff weight: 800 grams to 1600 grams
- Battery: 3S-4S 3300-4500mAh 25C+ single LiPo pack
- Battery cage: W55xH37xL173 mm - extreme dimensions, aim for 5-10 mm less
- Battery weight: max. 460 grams [2]
- Suitable motors: Ø28x26 mm, Ø28x30 mm, Ø32x28 mm, Ø35x28 mm, Ø35x36 mm
- Propellers: 9x5-inch (more locked-in, less airtime) or 10x5-inch (more airtime, less locked-in)
- ESC: 4x 18-30A switched
- Forward speed: ~60 km/h / ~40 miles/h
- Flight time: 10-15 minutes
- Center of Gravity: 15 mm forward of the bottom Center of Thrust mark [3] [4] [5] [6]
- Behaviors like: T-Rex 450 without 3D capability [7]
- Recommended flying area: minimum 25x25 meters
- Screws: Frame arms M2.5x5mm, frame spacers M3x6mm, motors M3x8mm (RCTimer/Tiger) [8]
- Clone models: HJ450, RM450 and Q450 [9]
- Product pages:
- DJI Hobby - Flame Wheel kits and NAZA flight controller
- Team BlackSheep - TBS Discovery - FPV focused frame
- Similar models:
Frame kit
The quad is build using separate base plates and frame arms. In other words, it is a purpose built kit using the DJI Flame Wheel arms for structural support and TBS Discovery plates for the central core and electronics installation.
- 1x DJI F450 Motor+Propellers+ESC+NAZA kit - from Flying-Hobby
- Alternatively:
- 2x DJI F450 Flame Wheel black arm - from Flying-Hobby
- 2x DJI F450 Flame Wheel white arm - from Flying-Hobby
- 1x TBS Discovery top and bottom plate including screws and damping tape - from TBS
- 1x TBS CORE video power distribution and OSD system - from TBS
- 1x TBS 100A current sensor - from TBS
- 1x TBS RF Tin Shield for TBS CORE - from TBS
Manual
- TBS Discovery electronics installation - all the wiring shown in a stylized way
- TBS CORE manual rev may - power distribution for the video system
- DJI F450 Flame Wheel user manual v1.6 - basic setup instructions for the Flame Wheel
- DJI NAZA Assistant user manual v1.4 - configure the flight controller
- DJI NAZA Assistant user manual v2.1 - configure the flight controller
- DJI NAZA Assistant user manual v2.2 - configure the flight controller
- WKM Detailed Descriptions on Autopilot parameter setting - guide for setting up NAZA autopilot
- OpenPilot Stabilization Configuration - useful fundamentals of PID control loops
- OpenPilot Stabilization Tuning for Multirotor - some practical tuning tips
Equipment
A complete base set includes four ESCs, four propellers, flight controller, rc transmitter radio, rc receiver, batteries, recording camera, fpv camera, video transmitter, video receiver, on-screen display module and antennas. Here's a good quick beginner guide.
ESC
Some popular ESCs for mulicopters. All ESCs must have 400Hz update rate for proper operation.
- Tiger Motors 18A ESC 2A/5V BEC
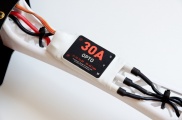
- DJI OPTO 30A no-BEC brushless speed controller
- HobbyKing F-20A BEC programmable ESC SimonK/WiiESC firmware - external crystal (stable)
- TBS branded RCTimer SK-30A Multicopter SimonK firmware ESC
Flight controller
At the moment there's a few good flight controllers to pick from, but the market is continually changing so this might not be up-to-date [10].
- DJI NAZA-M optional GPS - Smooth flying and stable flight, easy to setup, just a few parameters to configure
- OpenPilot CopterControl - A little tough to configure, but very good results for acrobatics and locked-in fast forward flight
- Abusemark Naze32 FunFly - Great locked-in feeling, minimal configuration needed, low price
- KK2 - Works pretty well, easy to adjust gains right on the board, not best but still good, low price
Propellers
Smaller propellers (9x5) works great on higher KV motors (900KV) and larger propellers (10x5) works great on lower KV motors (750KV).
- Graupner E-Prop 10x5-inch propellers - Balanced, great for RCTimer 750KV, DJI 920KV motors
- Graupner E-Prop 9x5-inch propellers - Balanced, great for Tiger 900KV, DJI 920KV motors
- RCTimer Carbon Fiber 9x5-inch propellers - Apparently balanced, good for testing and fast pod-racing
Common setups
This is a list of verified setup from people who has built their Disco. To use Graupner 10-inch props on motors with 5 mm shafts (Tiger), use a 8-to-5 mm reduces.
- Tiger Motors MT2216-10 / MT2216-11 900KV 210W brushless motor [11] [12] [13]
- RCTimer A2830-14 750KV 185W outrunner motor with prop adapter - replacement bearings available [16] [17]
- Note: Same as the TBS 750KV motors, just rebranded [18]
- Suggested setup: Graupner e-Prop 9x5, DJI 30A OPTO, NAZA GPS, Turnigy 4S3600mAh, 1121 grams without battery and GoPro2 [19]
- Suggested setup: Gaui 500X 10-inch set, Hobby King F-30A 30A ESC SimonK flashed, Nano-tech 4S 2200mAh, OpenPilot CC [20] [21]
- Suggested setup: APC 10x4.7, Turniny Plush 30A Flashed SimonK, KK2, Turnigy 4S4000mAh [22]
- DJI 2212 920KV 144W brushless motor [23] - similar/rebrand of EMAX 2212-3S 920KV [24]
- Sunnysky 2216-12 800KV 180W motor
- Suggested setup: APC slowfly 10x4.7-inch props, OpenPilot CC3D, HobbyKing F-30A SimonK ESC, Turnigy 4S4000mAh battery [27]
- Sunnysky 2212-13 980KV 150W motor
- Suppo 2810/12 1000KV 225W brushless motor
- Suggested setup: Graupner E-Prop 10x5 set, DJI OPTO 30A ESCs, DJI NAZA controller [30]
- NTM 28-30A 750KV 140W prop drive series motor
- NTM 28-26A 1200KV 250W prop drive series motor
- Note: Some reports of problems with SimonK ESCs [34] [35] [36] WiiESC fix
- Suggested setup: APC 8x3.8 propellers, Turnigy Plush 30A ESC, Nano-tech 4S 3300mAh, OpenPilot CC [37]
- Suggested setup: APC 10x4.5 propellers, Hobby King F-30A 30A ESC SimonK flashed [38]
- Suggested setup: APC 10x4.75 propellers, Hobby King F-30A 30A ESC SimonK flashed, 4S battery [39]
- Suppo 2814/8 1000KV 380W brushless motor
- Suggested setup: Graupner E-Prop 9x5 set, DJI OPTO 30A ESCs, 4S 3000mAh+1800mAh, DJI NAZA controller [40]
- SunnySky Angel A2212 2212-980KV 180W brushless motor
- Suggested setup: Graupner 9x5 propellers, 4S 3300mAh, OpenPilot CopterControl [41]
- Tiger MT-4006-13 740KV motor - no punch, vibration free
- Graupner Compact 300 740KV 9.6V - expensive
- Suggested setup: Graupner ESC 18-SC, DJI NAZA controller, Nano-tech 4S 3300mAh [45]
- BP Hobbies A2217-9 950KV 200W brushless outrunner motor
- Suggested setup: 10-inch propellers, Aeroquad controller, TowerPro 18A ESC, 4S 5000mAh [46]
Potential other candidates:
- TorxPower MC2216 Pro 900KV 210W brushless motor [47]
- NTM 28-26 1350KV 310W prop drive series motor [48]
- NX-4008 620KV Brushless quadcopter motor [49] [50]
- Note: Some reports of problems with SimonK ESCs and pancake/flat motors [51] - try wiiesc firmware
- FM-4008 620KV Brushless quadcopter motor [52]
- Avroto M2814-11S Short Shaft 770KV 350W Brushless motor [53]
- Tiger T-Motor MT2216-12 800KV 180W brushless motor [54]
- Tiger T-Motor MS2212 980KV 165W brussless motor [55]
Setup
- F450 Flame Wheel setup - basic setup of the DJI F450 Flame Wheel quadcopter
- TBS Discovery setup - list of my settings and configurations for the TBS Discovery
- EzUHF radio control system - short overview of the UHF control link
- Lawmate Mods - Lawmate video downlink is optimized with small modifications
TBS default setup
This is the default TBS setup offered on their website or by request.
- Motors: TBS branded Tiger Motors MT2216-11 900KV 210W brushless motor
- Propellers: Graupner E-Prop 9x5-inch propeller set (2xCW, 2xCCW)
- ESCs: TBS branded RCTimer SK-30A Multicopter SimonK firmware ESC (400Hz)
- Alternatively: HobbyKing F-30A 30A ESC with SimonK firmware flashed (400Hz)
- Transmitter: Futaba/Spektrum/JR 8-channel radio with ImmersionRC EzUHF 433 MHz 200mW/600mW transmitter module
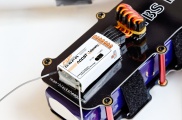
- Receiver: ImmersionRC EzUHF 8-channel 433 MHz diversity receiver
- Flight Controller: DJI NAZA-M flight controller with optional GPS module
- Alternatively: OpenPilot CopterControl 3D CC3D flight controller
- Battery: Zippy Compact 4000mAh 4S 25C / Turnigy nano-tech 4S 3300mah 35-70C Lipo pack
My base setup
This is the basis for the quad and makes for a perfect platform to start testing equipment.
- Motors: DJI 2212 920KV 144W brushless motor
- ESCs: DJI OPTO 30A no-BEC brushless speed controller
- Propellers: Graupner E-Prop 10x5 inch propeller set [56]
- Flight Controller: DJI NAZA no-GPS flight controller
- Transmitter: Spektrum DX7 7-channel radio with FrSky DHT 2.4 GHz 60mW transmitter
- Receiver: FrSky D6FR 2.4 GHz 6-channel two-way receiver
- Battery: Turnigy nano-tech 4S 3300mah 35-70C Lithium-ion Polymer 346.5 grams battery - really only need 25C
My upgraded setup
- Motors: Tiger Motors MT2216-11 900KV 210W brushless motors
- Alternatively: RCTimer A2830-14 750KV 185W outrunner motors
- ESCs: HobbyKing F-20A programmable ESC with bare leads - reprogrammed with WiiESC
- Alternatively: RCTimer 30A Brushless Programmable ESC with bare leads, internal oscillator (not optimal) - reprogrammed with RapidESC firmware
- Alternatively: RCTimer SK-30A SimonK Firmware multicopter speed controller
- Transmitter: Spektrum DX7 7-channel radio with ImmersionRC EzUHF 433 MHz 200mW/600mW transmitter - long range
- Receiver: ImmersionRC EzUHF 8-channel 433 MHz diversity receiver with Sander Style dipole UHF antennas - long range
- Flight Controller: OpenPilot CopterControl flight control - limited availability
- Battery: Zippy Compact 4S 4000mAh 25C Lipo Pack - same size and dimensions as Nano-tech 3300 mAh [60]
FPV base setup
This was my first ground station setup when using 1.3GHz for video and 2.4GHz for control (which turned out to be producing noise on the rc control channel).
- FPV camera: Security Camera 2000 PZ0420 600TVL camera with extra 2.8mm lense
- HD camera: GoPro HD Hero1 with SanDisk 8 GB SD-card
- Dampening: Align K10457A PU Adhesive Gel
- Video transmitter: Best Offer Buy BOB ESXF700mW SR-700MW 1.2GHz 700mW 12V blue/purple transmitter
- Microphone: Etech ETMIC 5V FPV Mini Mic
- Antenna: Tuned RG316 single dipole antenna
- Antenna: Cloverleaf 3 lobe circular polarized omnidirectional antenna
- Video receiver: Best Offer Buy Comtech module 12V receiver
- Antenna: Skew-Planar Wheel 4 lobe circular polarized omnidirectional antenna
- Power management: TBS Core video- and power-controller
- Goggles: FatShark Dominator FPV goggles
- Display: MacBook Air with EasyCAP DC60 USB video capture adapter
- Other: OEM 3S 2200mAh ground station batteries, custom-made power cables, composite video splitter, Sparkfun PRT-10374 Jumper Wire 4-pin 12-inch for camera to transmitter connection
FPV upgraded setup
This is a much improved setup based on 433MHz for the control link and 2.4GHz for the video downlink. This makes sure that the quadcopter is always within rc control while the video can drop out before the controls.
- FPV camera: Security Camera 2000 PZ0420 600TVL camera with extra 2.8mm lense
- HD camera: GoPro HD Hero1 with SanDisk 8 GB SD-card
- Dampening: Foam Ear Plugs and Thin Rubber Bands
- Video transmitter: Lawmate TM-240500-LM 2.4GHz transmitter - modded
- Microphone: Etech ETMIC 5V FPV Mini Mic
- Antenna: Stock 3dBi dipole antenna
- Video receiver: Lawmate RX-2460CK 2.4GHz receiver - modded
- Antenna: Stock 3dBi dipole antenna
- Power management: TBS Core video- and power-controller
- Goggles: FatShark Dominator FPV goggles
- Display: MacBook Air with EasyCAP DC60 USB video capture adapter
- Other: OEM 3S 2200mAh ground station batteries, custom-made power cables, composite video splitter, Sparkfun PRT-10374 Jumper Wire 4-pin 12-inch for camera to transmitter connection
Accessories
Useful (optional) equipment and tools to have around to make the whole experience better.
- Foam Ear Plugs - remove GoPro "jello" vibrations
- Align K10457A PU Adhesive Gel - less GoPro vibrations
- Pelican 1650 Case [61] [62]
- Maplin Robust high impact large travel case [63]
- Bolton Tools Watertight Pelican Style Hard Camera Case 20.5" X 17" X 9" [64]
- DJI F450 Motor Extension Plates [65] [66]
- Waterbuoy Intelligent miniature floatation device [67]
- USBasp AVR Programming Device - for programming Atmel based ESC controllers
- 3M Double-sided tape pack - Hobby King
- Minicircuits bandpass or lowpass filters - to cut any interfering frequencies on equipment lacking any input filtering
Tips and tricks
- To get rid of vibrationse/jello, use only good quality propellers, e.g. Graupner and APC [68] [69]
- For longer flight times, use low Kv motors and large propellers but watch the power usage
- To avoid propellers in the GoPro view, use Wide setting for 8-inch propellers and Medium for 10-inch propellers
- A 25A ESC is more than enough for this frame, max. 60A full throttle for all four controllers equals 15A per ESC, 10A margin [70]
- To a clean ESC install, solder the 3.5 mm socket motor connectors directly on the controller board [71]
- The standard DJI motor and propellers use a 8 mm shaft/bell, APC props are 6 mm and has to be adjusted, Graupner is 8 mm [72]
- Program the ESCs to be set up with Break off, Battery type NiMh (to turn off LiPo voltage cut-off), Cut-off type: soft cut, Cut-off voltage low, Aircraft type airplane, Start mode normal, Timing/response mode high (400 Hz), Governor off and everything else off [73] [74]
- Calibrate the throttle range for each ESC individually by setting the throttle stick high on power on and then low until a confirmation beep is heard
- Consider upgrading the ESC firmware to SimonK version get the full refresh rate needed for multirotors, RapidESC database shows all capable controllers
- Propeller thrust is only the amount a motor can carry/load, not at which speed, so therefore thrust determines the acceleration, kV determines the speed range [75]
- Only connect one BEC 5V power supply from a single ESC, disconnect the red power lead from the other three ESCs [76]
- On the flight controller, set Kp (instantaneously proportional error correction) to a high value to make the quad responsive and decrease 20% when it oscillates/nags, set Ki (integral/sum errors over time) to a high value to make it steady in windy, improper center of gravity, fast forward or long dives/turns, situations where the quad is off level for a fairly long period, decrease 20% when long slow oscillations occur [77]
- Since the front two arms are asymmetrical, increase pitch Kp and Ki with 1/3 of the value for roll (for OpenPilot) [78]
- On the receiver, set up fail-safe on signal loss so that throttle is above 10% and that NAZA flight mode is put to 70% or so the NAZA will go into fail-safe mode, and the rest of the sticks center, on failure the quadcopter will land smoothly by itself, one less unexpected fall from the sky to worry about [79]
- In a dive the back-end of the Discovery might not fall as quick as the front, a way to counter this might be to set Ki for pitch (OpenPilot) to higher value to correct for the lack of power to the front motors [80]
- The results on eCalc might show "over power", but since this is a multirotor the load is shared and only in bust/acceleration moments will the motors be taxed [81]
- If the motors stall, try to increase the battery voltage, e.g. go from 3S to 4S batteries to increase/up the torque of the motors [82]
- Balance the motor by attaching a zip-tie spinning the motor up, stop and move the zip-tie and try again, the point of least vibration is the point where centre of rotation and mass is close to zero [83]
- Change the throttle curve, either in OpenPilot (preferably) or on the radio, to be flat in the middle to reduce the change in throttle versus the stick movement, this should smooth your throttle response and allow for easy altitude adjustment - see pic [84]
- Reduce the top throttle point (dual rate) to 90% to make sure the flight controller still can take over control when throttle stick is at full
- In DJI NAZA Assistant setup, start off using basic rate gain 150/155/120/100 and for attitude gain 125/125, then adjust as needed [85] [86]
- To make the movement of the sticks less sensitive around the center, in attitude mode add 30% expo for elevator and aileron, 10% for rudder in the radio programming, in rate mode use 50% for elevator and aileron, 20% for rudder [87] [88]
- Center of Gravity (CG, CoG) is for balance, distributing the weight equally over each motor, bind two pieces of strings to create an X, this is the CG spot [89] [90]
- The flight controller does not need to be over the CG spot, on the TBS Discovery it should be mounted in the center of the two sets of four holes on the bottom plate [91] [92]
- Mount the flight controller on the CG spot, or alternatively anywhere on the frame and compensate the offset from CG in the software configuration (NAZA Assistant) [93] [94] [95]
- Change the throws/travel range to 140% for aileron and elevator before calibrating the flight controller input monitor, this increases the resolution of the stick input to give an even smoother flight (return the values to 100% afterwards for easier flight, see next point) [96]
- To get a smooth ride, lower the dual rate for aileron, elevator, rudder and throttle, e.g. 50%, so that a lot of stick input results in little actual quad movement, use a switch to change between two sets of rates (dual rates, launch and smooth ride) [97]
- Add a small piece of Kapton tape over all the solder points for the TBS Core, Cam and VTx headers and RC control headers to prevent accidental shortcircuits
- To keep a Lipo battery balanced and long lasting, set the voltage alarm to go off when the individual cell voltage settles around nominal 3.7V, for 3S what would be 11.1V and for 4S 14.8V
- When "jello" effect (caused by high frequency vibrations) appears on HD footage, use a set of soft memory foam earplugs between the frame and the GoPro camera [98]
- If horinzontal lines appear on the video stream, it is caused by the motor/rotor vibrations and apply a piece of gel or vibration reduction foam to the video transmitter [99]
- The center of thrust is 15 mm forward of the center of gravity, CoT balances the load equally on each of the four motors [100]
- If it's too nose heavy it will bob up and down in forward flight, too tail heavy and it will get very pitchy/twitchy [101]
- A TBS Core backup battery can be soldered to the two pads marked VIN2 but in reality is not really need if the main battery is dead the quad will fall to the ground, TBS Core picture
- On the NAZA flight controller, mask the sides with black tape to minimize the loss of height when sunshine bits the barometer [102]
- Using widest GoPro setting, put 1.5cm padding behind the camera to offset the view of the propellers [103]
- If you increase the NAZA attitude gains, it allows the quad to tilt more with elevator/aileron transmitter inputs, that way you can get decent fast forward flight speeds [104]
- After tearing up the ESC heat shrink to flash the firmware, replace it with a similar new tube with 20 mm diameter, also most ESC use standard 3.5mm bullet connectors for the motor connection
Flight controller settings
A few links to NAZA and CopterControl stabilization settings suitable for the TBS Discovery. List format: pitch/roll/raw/vertical and pitch/roll. For DJI NAZA, expect the gain to be between 100 and 160 after calibration.
- Trappy's DJI NAZA MT4006-13 740KV 10x5 settings - 150/155/120/100 and 125/125
- Trappy's DJI NASA 750KV 10x5 4S3300mAh settings - 134/109/93/198 and 183/143 [105]
- Trappy's DJI NASA 900KV 9x5 4S3300mAh settings - 166/135/131/179 and 188/176 [106]
- Enthlapy's Discovery Beta OpenPilot CC3D settings
- Enthlapy's OpenPilot CC3D settings
- mechnan's DJI NAZA fine tuned settings - 117/101/200/180 and 110/110
- rcschim's DJI NAZA settings - 125/125/125/125 and 110/110
- MidwestRob's MT2216 900KV DJI ESC settings - 150/135/125/125 and 140/125 [107]
- Enthlapy's Discovery CC3D 900KV 9x5 settings
- WiseDuck's NAZA DJI motors and ESC - 150/150/150/100 with 40% expo on pitch, roll, throttle
Build logs
For details on building and setting up the Discovery, take a look at the pages below for an idea.
- juz' OpenPilot build log
- Enthlapy's OpenPilot build log
- meme's build log
- Rensen's DJI Build Log
- Traveller's Disco build adventure
- kloner's TBS Discovery build log
- olivier30900's NAZA GPS build log
- WiseDuck's NAZA build log
- isotop's NAZA low cost build log
- acuralegendz's NAZA build log
- rcschim's NAZA build log
- RTRyder's TBS and QAV builds
- jcoahran's NAZA EagleTree build
Also follow TBS Discovery quadcopter thread on FPVLab.
Tools
- eCalc multicopter - calc the most efficient propeller for a multicopter
- eCalc - find the optimal propeller+motor combination
- Adamone motorcalc - figure out a good motor and propeller combination
- NAZA gains database - get an idea of the gain to aim for
- OpenPilot Advanced Mixer Settings spreadsheet - baselines to start tweaking
Shops
- teamblack-sheep.com - Home of TBS Zephyr I & II, Discovery and CORE, AU
- rctimer.com - Lots of motors, ESCs and clone Flame wheel, CN
- flying-hobby.com - Good selection of DJI items and great prices, HK
- goodluckbuy.com - DJI items and a lot of other accessories, HK
- uavproducts.com - Source for DJI kits and frames, US
- hobbyking.com - Motors, ESCs, batteries and a lot more, HK
- hobby-wing.com - DJI parts and clones, HK
- globe-flight.de - Multicopter items, FPV equipment, propellers, DE
- servocity.com - Pan and tilt systems
- addictiverc.com - Source of Graupner propellers, US
- elecricwingman.com - Another source of Graupner propellers, good prices, UK
- gothelirc.com - APC, Gaui, Graupner propellers, US
- altigator.com - Graupner props, good prices, BE
- faber-modellbau.de - Graupner props for 8USD, 7USD shipping, bank transfers only
Video
This is the official Team BlackSheep video of the final production frame.
Another video showing basic flight and setup, german.
Final Setup
Below is a photo gallery of the final build of my Discovery with everything mounted.
