Film Projects
Blue or Greenscreen

Aka. chroma key, and color keying.
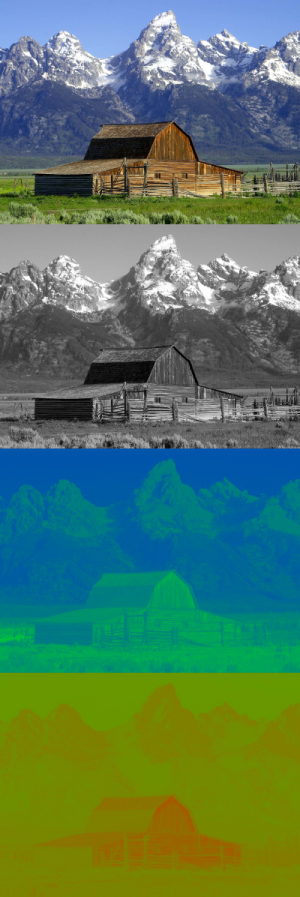
YUV color space
YUV is used for analog video and is not an absolute color space, it's a way of encoding RGB information [1]. The equivalent abbreviation for digital video is YCbCr.
Chroma resolution resampling
- 4:4:4 (Y:U:V or Y:Cb:Cr) - full resolution / high bandwidth
- 4:2:0 (Y:U:V or Y:Cb:Cr) - less color resolution / lower bandwidth - PAL DV, HDV
- 4:1:1 (Y:U:V or Y:Cb:Cr) - less color resolution / lower bandwidth - NTSC DV
MacBreak part 2 explains and shows how chroma subsampling works.
Because of storage and transmission limitations, there is always a desire to reduce (or compress) the signal. [2]
The green information is usually preserved in the Y channel [3]. Which makes a green background perfect because of the extra channel resolution on 4:2:0 and 4:1:1 based cameras. In addition green is not a color usually found on human beings, making it easy to key.
Chroma subsampling causes nasty problems for film makers trying to do keying with blue or green screening. The chroma interpolation along edges produces noticeable combing artifacts.
When using Adobe Premiere and Adobe Photoshop, the easiest way is to blur the UV channels in Photoshop with 4 pixels horizontal motion blur for NTSC DV and 2-4 pixel gaussian blur for PAL DV [4]. Sample:
File:Greenscreen resampling keying.png
Quotes
If you can plan your DV shot to have mostly dark subjects (dark hair & clothing) in front
of a green screen (or bright/blond subjects in front of blue), you can use the color difference
key to pull a quick core matte, then turn to a luma-based solution to bring out the edge details.
With DV and DVCam, you won't have as much color information per pixel due to compression, so
good mattes are harder to pull. It ends up looking pretty aliased. Both NTSC and Pal DV formats
have pretty low sampling (4:1:1 for NTSC and 4:2:0 for Pal).
It was all pixelated and jagged edges. How do u get around this?
The technique that I've heard used most often is that you blur the UV channels (the chromanance
part of the YUV) then mix that back in with the Y (luminance) and your ready to pull a matte. Do
just enough blur so the pixelated jagged edges soften. Use that only for pulling the matte. Once
you've got your matte, go back and use the original footage for applying the matte.
- CGTalk GreenScreen
- PCQuest Matte creation in After Effects
- DVCreators Green Screen!
- MacRumors Bluescreen on the cheap?
- Bluescreen on a budget
- Tips for compositing DVC Pro HD footage
- Making Light Of The Matter
- MacBreak HD green screen shooting part 1 - setup
- MacBreak HD green screen shooting part 2 - resolutions and color compression
- Wikipedia Chroma subsampling
- Chroma key Wikiepedia Chroma key (Bluescreen)
- HDV or DV for chroma Keying?
- Clean DV Bluescreen/Greenscreen Composites
- Chroma Keying in Final Cut Pro HD
Programs / Plug-ins
- dvMatte Pro - Final Cut Pro, OSX
- Keylight - After Effects
- Shake - OS X only
- Final Cut Pro - OS X only
- Boris Key filters - After Effects, Final Cut Pro, etc