Xbox 360 Hitachi-LG 79 Flash
The latest Hitachi-LG drive comes with a new 79FK/79FL firmware. Only newer machines manufactured in the end of 2006 and later could have the new drive, also the new Xbox 360 Elite package will either have a BenQ or Hitachi-LG 79 drive.
Update: It's now possible to flash the 79 drive using software, follow this tutorial by Podger.

Mode B
To make the new drive visible in Windows, aka Mode B, a new separate pcb board has to be soldered the the drive's flash memory connections.
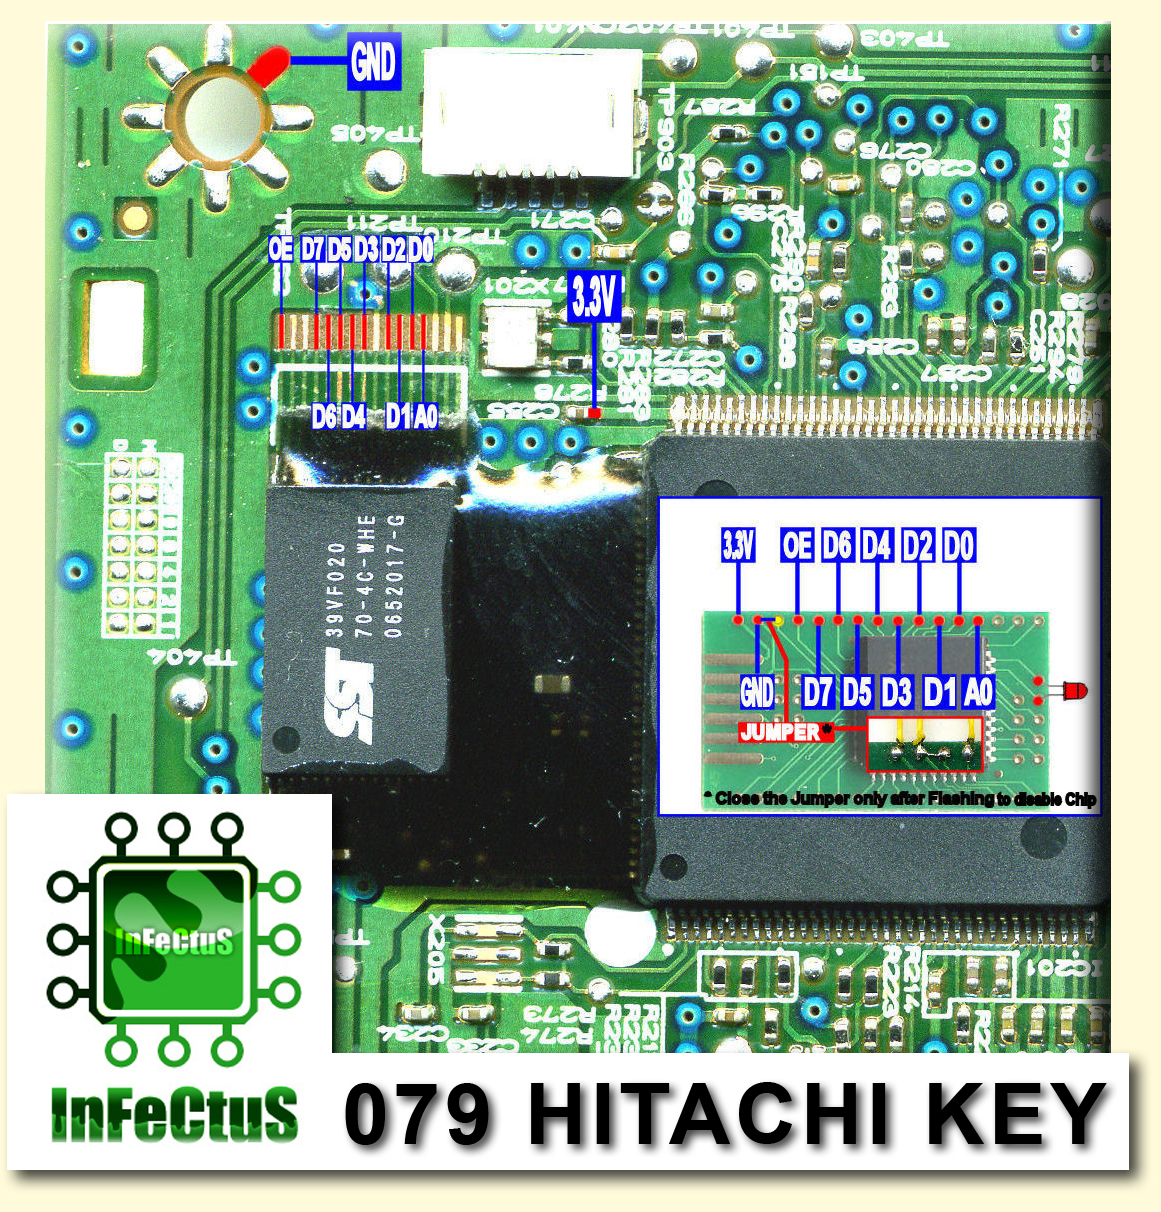
There are currently two different boards available, the Infectus 079 Key Addon and the Maximus 79PassKey. I will mount the former in this tutorial.

Dissamble
Open up the Xbox 360 and disconnect the DVD drive, open the drive up by removing the 6 bottom screws. Disconnect the 4 flexible flat cables and unmount the DVD circuit board.

Soldering
Removing Resin
All newer Hitachi-LG and Toshiba-Samsung drives will have a thick coat of resin or glue over the flash memory region.
To remove the resin, use a heatgun to warm the entire board and especially the area around the right side of the SST flash memory chip. Cover the other parts with thin foil. Only heat it for 1 minute and use a razor blade to crack and lift the resin. If it's hard to remove it, re-heat the area and try again.

Clean Pads
Once the resin is removed, clean the solder pads for resin. To do this, add some solder flux to the pads, with the solder iron in one hand and the solder in the other, heat the pad and a few seconds later touch the solder wire on to the pad. This should create a thin layer of solder to mount the wires on later.
Only pre-thin the necessary wires, makes it easier to keep track of the solder points.

Connect Wires
Stick a double-sided adhesive pad to the back of the Infectus board and put it where there is enough space for to move freely and not obstruct any of the DVD mechanics. I placed it next to the tray motor at the front end.
Download the schematics (mirror) for the board and plan where the wires should go.
Get some 30 AWG / 0.25 mm wire and strip the end, add some flux, place it on top of the pad, touch the wire for 2 seconds with the solder iron while pushing down, and let it cool down a few seconds before you let go. Do the same for all the other points.


You might want to use a thicker wire for the ground wire, maybe 25 AWG / 0.45 mm.

LED
The LED showed on the schematics isn't really necessary, it only indicates if there is 3.3v power available. I dropped it.
Flashing
The drive will behave as a normal Hitachi-LG drive one the Mode B board is connected.
Power Up
Connect the drive to a native SATA connector. I tried the Team Xecuter Connectivity Kit v2 first, but I had a hard time getting the drive to dump the firmware.
Make sure the drive is recognized in the Device Manager (HL-DT-ST DVD-ROM GDR3120L).

360 Firmware Toolbox
Download the latest 360 Firmware Toolbox from Xbox-Scene, as of writing v4.0.
Dumping Firmware
Select 'Tools' and 'Direct Drive Dump'. If the drive is connected it should show in the dropdown menu.

Insert a Xbox 360 game or a dual layer DVD movie before continuing. This will ready the drive. Click 'RAW Dump Firmware' and after a few seconds you should be prompted to enter the filename of the dump, e.g. original.bin.

Make a backup of this file. It contains the encryption key for the drive and is useful if you want to replace the drive later.

Patch Firmware
Select 'Tools' and 'Smart Hack Patcher'. Click the three dots and enter the name of the new hacked firmware, e.g hacked.bin. Make sure 'i-XTREME12_78+V1' or similiar is selected in 'Rule Set', now click 'Generate file'.

Flash Firmware
Select 'Tools', 'Direct Drive Flash', and 'Differential Flash'. This function will flash only the sectors needed to update to the hacked firmware.

Click 'Read and Detect Differences'. The tool will figure out the sector locations needed to be flashed.

For a 79 drive, make sure 'Internal Flasher' is selected as the flash program. Click 'Start Flashing' and after 4-5 seconds the flash should be finished.

Re-install the drive in the Xbox 360 and try to run a DVD+R DL backup burned on a DVD writer with booktype set to DVD-ROM.
Removing Chip
The Mode B chip is no longer needed once the new hacked firmware has been flashed to the drive. Either disable the chip with the jumper or remove the entire chip by de-soldering the wires.
