Uncategorized files
From ivc wiki
Jump to navigationJump to search
Showing below up to 500 results in range #1,001 to #1,500.
View (previous 500 | next 500) (20 | 50 | 100 | 250 | 500)
 Mate x chainfoam2.jpg 1,200 × 900; 453 KB
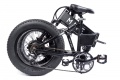 Mate x folding ebike folded.jpg 2,000 × 1,333; 606 KB
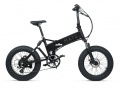 Mate x folding ebike overview.jpg 1,188 × 874; 210 KB
 Mate x folding ebike overview.png 1,815 × 1,265; 840 KB
 Mate x key-disp black-white display.jpg 494 × 530; 118 KB
 Mate x lishui foc controller firmware update.png 652 × 428; 10 KB
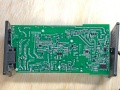
 Mate x lishui lsw1545-5-2m 25a controller1.jpg 1,800 × 1,350; 872 KB
 Mate x lishui lsw1545-5-2m 25a controller2.jpg 1,800 × 1,350; 894 KB
 Mate x lishui lsw1545-5-2m 25a controller3.jpg 1,800 × 1,350; 932 KB
 Mate x lishui lsw856-66-1m 25a controller1.jpg 1,536 × 2,048; 295 KB
 Mate x lishui programming port.jpg 866 × 1,154; 397 KB
 Mate x lishui serial pinout.png 425 × 399; 45 KB
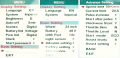
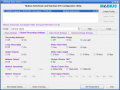
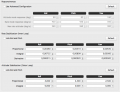
 Mate x lishui stm32 parameters setting software general.png 793 × 556; 53 KB
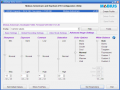
 Mate x lishui stm32 parameters setting software motor.png 788 × 553; 216 KB
 Mate x perk boosted battery.png 302 × 546; 72 KB
 Mate x perk flashy color display.png 302 × 546; 66 KB
 Mate x perk high-speed charger.png 302 × 546; 41 KB
 Mate x perk hydraulic brakes.png 302 × 546; 64 KB
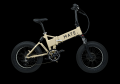
 Mate x perk imperial woodland finish.png 302 × 546; 56 KB
 Mate x perk jet grey color.png 302 × 546; 54 KB
 Mate x perk joker light.png 302 × 546; 15 KB
 Mate x perk metal fenders.png 302 × 546; 99 KB
 Mate x perk rear rack lights.png 302 × 546; 88 KB
 Mate x perk spare tires.png 302 × 546; 68 KB
 Mate x perk thumb throttle.png 302 × 546; 65 KB
 Mate x perk unicorn finish.png 302 × 546; 56 KB
 Mate x reflectors1.jpg 1,200 × 900; 441 KB
 Mate x reflectors2.jpg 1,200 × 900; 478 KB
 Mate x sans sslc300v55 controller1.jpg 1,800 × 1,350; 974 KB
 Mate x sans sslc300v55 controller2.jpg 1,800 × 1,350; 1.04 MB
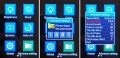
 Matex color display china.png 1,707 × 828; 779 KB
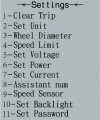 Matex key-disp kd51c-d settings.png 428 × 512; 136 KB
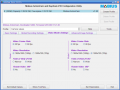
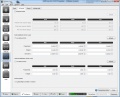
 Matex ukriver ukc1 settings.jpg 1,700 × 820; 919 KB
 Mba incipio case open.jpg 1,200 × 795; 287 KB
 Mba incipio case top.jpg 1,200 × 795; 299 KB
 MicroSD secure digital card pinout.gif 56 × 98; 410 bytes
 MiniSD secure digital card pinout.gif 54 × 105; 620 bytes
 Mobius tuned0.png 824 × 620; 169 KB
 Mobius tuned1.png 826 × 621; 177 KB
 Mobius tuned2.png 827 × 620; 155 KB
 Mobius tuned3.png 824 × 621; 153 KB
 Moccamaster-68 model manual ENG.pdf ; 1.41 MB
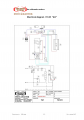 Moccamaster-741-ao-electrical-schematic.png 1,240 × 1,766; 288 KB
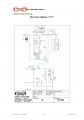 Moccamaster-741-electrical-schematic.png 1,240 × 1,766; 284 KB
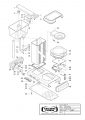 Moccamaster-741-exploded-view1.png 1,662 × 2,351; 405 KB
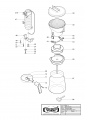 Moccamaster-741-exploded-view2.png 1,653 × 2,339; 40 KB
- Moccamaster-741-user-US-manual.pdf ; 2.72 MB
- Moccamaster-741-user-manual.pdf ; 1.03 MB
- Moccamaster-KBG-Select-US-Manual.pdf ; 681 KB
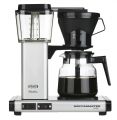 Moccamaster-kb-741-ao.jpg 1,942 × 2,000; 351 KB
 Moccamaster-model-automatic-drip-stop.jpg 274 × 226; 14 KB
 Moccamaster-model-cylindrical.jpg 190 × 265; 14 KB
 Moccamaster-model-descaling-indicator.jpg 289 × 76; 7 KB
 Moccamaster-model-dual-setting-hotplate.jpg 328 × 72; 11 KB
 Moccamaster-model-filter-platform.jpg 253 × 117; 14 KB
 Moccamaster-model-glass-carafe.jpg 225 × 254; 17 KB
 Moccamaster-model-manual-adjust-drip-stop.jpg 268 × 214; 25 KB
 Moccamaster-model-rectangular-no-platform.jpg 427 × 536; 36 KB
 Moccamaster-model-rectangular.jpg 225 × 322; 21 KB
 Moccamaster-model-thermo-carafe.jpg 223 × 327; 16 KB
 Moccamaster-model-volume-control-switch.jpg 309 × 86; 11 KB
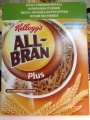 Muesli all-bran plus.jpg 960 × 1,280; 282 KB
 Muesli all-bran plus ingredienser.jpg 960 × 1,280; 257 KB
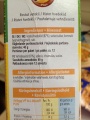
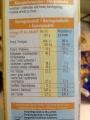 Muesli all-bran plus næring.jpg 960 × 1,280; 283 KB
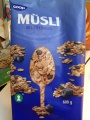
 Muesli axa 4korn.jpg 960 × 1,280; 256 KB
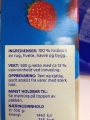 Muesli axa 4korn ingredienser.jpg 960 × 1,280; 228 KB
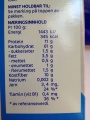 Muesli axa 4korn næring.jpg 960 × 1,280; 205 KB
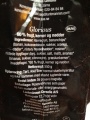
 Muesli axa glorious.jpg 960 × 1,280; 176 KB
 Muesli axa glorious ingredienser.jpg 960 × 1,280; 196 KB
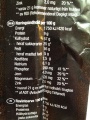 Muesli axa glorious næring.jpg 960 × 1,280; 240 KB
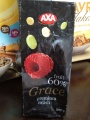 Muesli axa grace.jpg 960 × 1,280; 179 KB
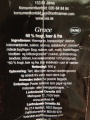 Muesli axa grace ingredienser.jpg 960 × 1,280; 223 KB
 Muesli axa grace næring.jpg 960 × 1,280; 267 KB
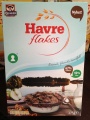
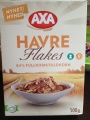 Muesli axa havre flakes.jpg 960 × 1,280; 262 KB
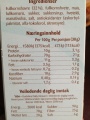
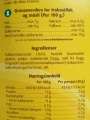
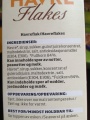 Muesli axa havre flakes ingredienser.jpg 960 × 1,280; 283 KB
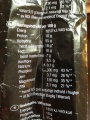
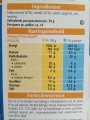
 Muesli axa havre flakes næring.jpg 960 × 1,280; 397 KB
 Muesli coop blueberries.jpg 960 × 1,280; 228 KB
 Muesli coop blueberries ingredienser.jpg 960 × 1,280; 370 KB
 Muesli coop blueberries næring.jpg 960 × 1,280; 285 KB
 Muesli coop musli.jpg 960 × 1,280; 187 KB
 Muesli coop musli fibre fruit.jpg 960 × 1,280; 373 KB
 Muesli coop musli fibre fruit ingredienser.jpg 960 × 1,280; 545 KB
 Muesli coop musli fibre fruit næring.jpg 960 × 1,280; 270 KB
 Muesli coop musli fruit.jpg 960 × 1,280; 304 KB
 Muesli coop musli fruit ingredienser.jpg 960 × 1,280; 458 KB
 Muesli coop musli fruit næring.jpg 960 × 1,280; 400 KB
 Muesli coop musli ingredienser.jpg 960 × 1,280; 173 KB
 Muesli coop musli næring.jpg 960 × 1,280; 208 KB
 Muesli kellogs all-bran regular.jpg 960 × 1,280; 230 KB
 Muesli kellogs all-bran regular ingredienser.jpg 960 × 1,280; 231 KB
 Muesli kellogs all-bran regular næring.jpg 960 × 1,280; 225 KB
 Muesli quaker havre flakes.jpg 960 × 1,280; 169 KB
 Muesli quaker havre flakes ingredienser.jpg 960 × 1,280; 205 KB
 Muesli quaker havre flakes næring.jpg 960 × 1,280; 192 KB
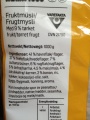
 Muesli quaker havre fras ingredienser.jpg 960 × 1,280; 332 KB
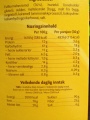 Muesli quaker havre fras næring.jpg 960 × 1,280; 337 KB
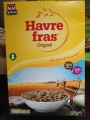 Muesli quaker havre fras original.jpg 960 × 1,280; 276 KB
 Muesli rema1000 frukt musli.jpg 960 × 1,280; 296 KB
 Muesli rema1000 frukt musli ingredienser.jpg 960 × 1,280; 276 KB
 Muesli rema1000 frukt musli næring.jpg 960 × 1,280; 276 KB
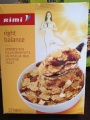 Muesli rimi right balance.jpg 960 × 1,280; 290 KB
 Muesli rimi right balance ingredienser.jpg 960 × 1,280; 317 KB
 Muesli rimi right balance næring.jpg 960 × 1,280; 301 KB
 Muesli vita blåbær tranebær.jpg 960 × 1,280; 353 KB
 Muesli vita blåbær tranebær ingredienser.jpg 960 × 1,280; 367 KB
 Muesli vita blåbær tranebær næring.jpg 960 × 1,280; 474 KB
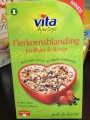 Muesli vita jordbær rosin.jpg 960 × 1,280; 348 KB
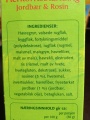 Muesli vita jordbær rosin ingredienser.jpg 960 × 1,280; 534 KB
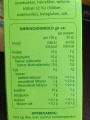
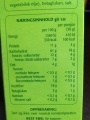 Muesli vita jordbær rosin næring.jpg 960 × 1,280; 433 KB
 Oil stove alternate build burner.jpg 1,100 × 736; 176 KB
 Oil stove alternate build door.jpg 1,100 × 736; 174 KB
 Oil stove alternate build netting.jpg 1,100 × 736; 178 KB
 Oil stove alternate build overview.jpg 1,100 × 736; 118 KB
 Oil stove complete burner conduit.jpg 1,100 × 736; 153 KB
 Oil stove complete overview.jpg 1,100 × 736; 113 KB
 Oil stove complete wick.jpg 1,100 × 736; 133 KB
 Oil stove complete wick oiled.jpg 1,100 × 736; 159 KB
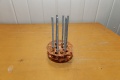 Oil stove copper threaded rods.jpg 1,100 × 736; 117 KB
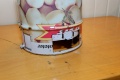
 Oil stove large can air inlet cut.jpg 1,100 × 736; 127 KB
 Oil stove large can air inlet door.jpg 1,100 × 736; 133 KB
 Oil stove large can air inlet doors inside.jpg 1,100 × 736; 153 KB
 Oil stove large can air inlet size.jpg 1,100 × 736; 121 KB
 Oil stove large can hole.jpg 1,100 × 736; 129 KB
 Oil stove medium can mount screws.jpg 1,100 × 736; 147 KB
 Oil stove medium can split.jpg 1,100 × 736; 107 KB
 Oil stove small can copper threaded rods inserted.jpg 1,100 × 736; 125 KB
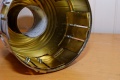
 Oil stove small can netting.jpg 1,100 × 736; 151 KB
 Oil stove small can netting closeup.jpg 1,100 × 736; 184 KB
 Oil stove small can split.jpg 1,100 × 736; 123 KB
 Oil stove small remove bottom.jpg 1,100 × 736; 97 KB
 Pcb design lpf-photo-close-back.jpg 1,200 × 795; 369 KB
 Pcb design lpf-photo-close-front.jpg 1,200 × 795; 403 KB
 Pcb design lpf-photo.jpg 1,200 × 795; 451 KB
 Pcb design lpf.png 733 × 191; 10 KB
 Pcb design usb-ttl-photo.jpg 1,200 × 795; 380 KB
 Pcb design usb-ttl.png 848 × 561; 32 KB
 Piccolo big.jpg 500 × 461; 63 KB
 Pid overshoot.gif 370 × 276; 14 KB
 PowerMac G4 sawtooth.jpg 203 × 245; 10 KB
 PowerMac g4 fastmac upgrade.jpg 353 × 261; 24 KB
 PowerMac g4 newertech upgrade.jpg 683 × 613; 70 KB
 PowerMac g4 owc upgrade.jpg 502 × 513; 77 KB
 Pyrit cluster 01.jpg 730 × 1,100; 306 KB
 Pyrit cluster 02.jpg 730 × 1,100; 290 KB
 Pyrit cluster 03.jpg 730 × 1,100; 285 KB
 Pyrit cluster 04.jpg 730 × 1,100; 238 KB
 Pyrit cluster 05.jpg 730 × 1,100; 258 KB
 Pyrit cluster 06.jpg 730 × 1,100; 229 KB
 Pyrit cluster 07.jpg 730 × 1,100; 255 KB
 Pyrit cluster 08.jpg 730 × 1,100; 297 KB
 Pyrit cluster 09.jpg 730 × 1,100; 266 KB
 Pyrit cluster 10.jpg 1,100 × 730; 210 KB
 Pyrit cluster 11.jpg 730 × 1,100; 297 KB
 Pyrit cluster 12.jpg 730 × 1,100; 333 KB
 Pyrit cluster 13.jpg 1,100 × 730; 241 KB
 Pyrit cluster 14.jpg 1,100 × 730; 184 KB
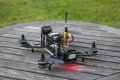 QAV250 back.jpg 1,000 × 667; 188 KB
 QAV250 logo transparent.png 1,920 × 1,080; 118 KB
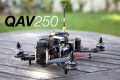 QAV250 main.jpg 2,000 × 1,333; 340 KB
 QAV250 naze32 pid1 ivc 2014-08-17.png 1,024 × 706; 92 KB
 QAV250 pid ivc 2014-04-15.png 848 × 545; 70 KB
 QAV250 pid ivc 2014-05-18.png 837 × 642; 78 KB
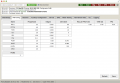
 Qav250 lumenier openpilot pids.jpg 1,066 × 860; 211 KB
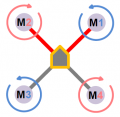 Quadcopter motor config.png 351 × 343; 19 KB
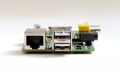
 Raspberry Pi1.jpg 1,200 × 794; 89 KB
 Raspberry Pi10.jpg 1,200 × 794; 110 KB
 Raspberry Pi2.jpg 1,200 × 794; 116 KB
 Raspberry Pi3.jpg 1,200 × 794; 136 KB
 Raspberry Pi4.jpg 1,200 × 795; 219 KB
 Raspberry Pi5.jpg 794 × 1,200; 262 KB
 Raspberry Pi6.jpg 1,200 × 794; 274 KB
 Raspberry Pi7.jpg 1,200 × 794; 209 KB
 Raspberry Pi8.jpg 1,200 × 794; 113 KB
 Raspberry Pi9.jpg 1,200 × 794; 103 KB
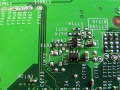 Resistor R6T3 disabled.JPG 640 × 480; 182 KB
 Rmc2lxp front.jpg 1,365 × 407; 135 KB
 Rmc2lxp open.jpg 1,416 × 801; 172 KB
 Robot Labyrinth tools.jpg 2,048 × 1,536; 982 KB
 Robot arm application.png 700 × 297; 20 KB
 Robot arm armassembly.jpg 1,100 × 736; 112 KB
 Robot arm baseassembly.jpg 1,100 × 736; 140 KB
 Robot arm box battery brackets.jpg 1,100 × 736; 142 KB
 Robot arm box brackets lower.jpg 1,100 × 736; 173 KB
 Robot arm box brackets overview.jpg 736 × 1,100; 164 KB
 Robot arm box brackets upper.jpg 1,100 × 736; 210 KB
 Robot arm box prebuild feet closeup.jpg 1,100 × 736; 179 KB
 Robot arm box prebuild front overview.jpg 1,100 × 736; 135 KB
 Robot arm box prebuild front right.jpg 1,100 × 736; 106 KB
 Robot arm box pump hose mount.jpg 1,100 × 736; 205 KB
 Robot arm box pump robber membranes.jpg 736 × 1,100; 156 KB
 Robot arm box solenoid valve.jpg 736 × 1,100; 170 KB
 Robot arm box tank inserted overview.jpg 736 × 1,100; 189 KB
 Robot arm box water hose.jpg 736 × 1,100; 196 KB
 Robot arm final inside closeup eee.jpg 1,100 × 736; 187 KB
 Robot arm final inside closeup routing.jpg 1,100 × 736; 177 KB
 Robot arm final inside closeup switches.jpg 1,100 × 736; 160 KB
 Robot arm final inside switches.jpg 1,100 × 736; 180 KB
 Robot arm final inside tank hose.jpg 736 × 1,100; 170 KB
 Robot arm final inside top.jpg 1,100 × 736; 169 KB
 Robot arm final overview.jpg 736 × 1,100; 154 KB
 Robot arm final poweroff tank front left.jpg 736 × 1,100; 191 KB
 Robot arm final poweroff tank front right.jpg 736 × 1,100; 181 KB
 Robot arm final testing indoors longshot.jpg 1,100 × 736; 114 KB
 Robot arm final testinh indoors.jpg 1,100 × 736; 91 KB
 Robot arm final top arm base.jpg 1,100 × 736; 149 KB
 Robot arm final top arm beamend.jpg 1,100 × 736; 100 KB
 Robot arm final top arm head.jpg 736 × 1,100; 104 KB
 Robot arm final top arm overview.jpg 736 × 1,100; 116 KB
 Robot arm final top arm webcam.jpg 1,100 × 736; 96 KB
 Robot arm final top cable routing.jpg 1,100 × 736; 148 KB
 Robot arm final webcam mbp overview.jpg 1,100 × 736; 131 KB
 Robot arm final webcam mbp screen.jpg 1,100 × 736; 187 KB
 Robot arm final without tank front.jpg 736 × 1,100; 187 KB
 Robot arm final without tank inside.jpg 1,100 × 736; 183 KB
 Robot arm headcloseup.jpg 736 × 1,100; 105 KB
 Robot arm inputlag.jpg 1,100 × 736; 209 KB
 Robot arm standingassembly.jpg 736 × 1,100; 108 KB
 Robot arm top mount front.jpg 1,100 × 736; 85 KB
 Robot arm top mount guide hose.jpg 1,100 × 736; 110 KB
 Robot arm top mount pipe detail.jpg 736 × 1,100; 100 KB
 Robot arm top mount side.jpg 1,100 × 736; 105 KB
 Robot arm wiring box closing.jpg 736 × 1,100; 143 KB
 Robot arm wiring jbox black red.jpg 1,100 × 736; 173 KB
 Robot arm wiring overview.jpg 736 × 1,100; 204 KB
 Robot arm wiring relays.jpg 736 × 1,100; 182 KB
 Robot arm wiring rfid relay controller.jpg 1,100 × 736; 232 KB
 Robot arm wiring servo controller.jpg 736 × 1,100; 206 KB
 Robot arm wiring switches connected.jpg 1,100 × 736; 185 KB
 Robot arm wiring switches connected side.jpg 1,100 × 736; 191 KB
 Robot arm wiring switches front.jpg 1,100 × 736; 98 KB
 Robot arm wiring switches inside.jpg 1,100 × 736; 114 KB
 Robot arm wiring valve.jpg 736 × 1,100; 173 KB
 Robotic arm watercannon closeup.png 881 × 665; 22 KB
 Robotic arm watercannon left.png 1,003 × 757; 27 KB
 Robotic arm watercannon overview.png 1,151 × 869; 30 KB
 Robotic arm watercannon right.png 996 × 752; 24 KB
 Room control application.png 550 × 350; 20 KB
 Room control computer1.jpg 960 × 643; 162 KB
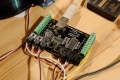 Room control controller1.jpg 960 × 642; 184 KB
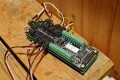 Room control controller2.jpg 960 × 643; 172 KB
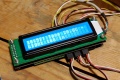 Room control displaypanel1.jpg 960 × 642; 177 KB
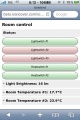 Room control iphone.jpg 320 × 480; 24 KB
 Room control relay1.jpg 960 × 643; 69 KB
 Room control relay2.jpg 960 × 643; 86 KB
 Room control relay3.jpg 960 × 643; 57 KB
 Room control relay installed.jpg 960 × 643; 141 KB
 Room control relaysingle1.jpg 960 × 643; 50 KB
 Room control relaysingle2.jpg 960 × 643; 66 KB
 Room control relaysingle3.jpg 960 × 642; 62 KB
 Room control schematic.png 900 × 954; 441 KB
 Room control sensors1.jpg 960 × 643; 104 KB
 Roomba 770.jpg 896 × 899; 86 KB
 Roomba 780.jpg 1,200 × 1,182; 307 KB
 Roomba convert board move dome switches.jpg 4,032 × 3,024; 3.37 MB
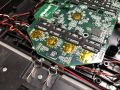
 Roomba convert board reconfigure.jpg 4,032 × 3,024; 1.93 MB
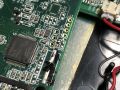
 Roomba convert board remove touch brackets.jpg 4,032 × 3,024; 2.33 MB
 Rsync cygwin windows.png 667 × 333; 9 KB
 Rsync putty linux.png 673 × 335; 12 KB
 Running shoe nikefree3v2.jpg 750 × 516; 46 KB
 Running shoe nikefree3v4.jpg 600 × 393; 34 KB
 Running shoe nikefree3v5.jpg 750 × 500; 83 KB
 Running shoe nikefreeflyknit40.jpg 1,280 × 692; 274 KB
 Running shoe sauconykinvara1.jpg 2,400 × 1,800; 383 KB
 Running shoe sauconykinvara5.jpg 395 × 227; 24 KB
 Running shoe skechersgobionic.jpg 1,523 × 1,015; 119 KB
 SD secure digital card pinout.gif 58 × 101; 459 bytes
 Sc811t-420 open.jpg 261 × 222; 12 KB
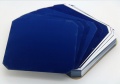
 Solar panel battery.jpg 622 × 500; 50 KB
 Solar panel controller.jpg 1,600 × 1,090; 683 KB
 Solar panel lamination.png 901 × 493; 108 KB
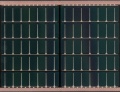
 Solar panel mono cell.jpg 800 × 557; 85 KB
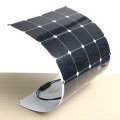 Solar panel mono flexible.jpg 1,200 × 1,200; 181 KB
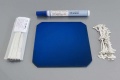 Solar panel mono kit.jpg 850 × 567; 73 KB
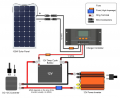 Solar panel system.png 1,024 × 835; 267 KB
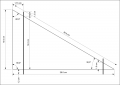 Solar power drawing.png 1,040 × 734; 47 KB
 Solar power panel.jpg 325 × 250; 30 KB
 Solar power stand back.jpg 1,100 × 736; 119 KB
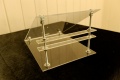
 Solar power stand front.jpg 1,100 × 736; 136 KB
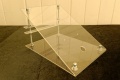
 Solar power stand side.jpg 1,100 × 736; 84 KB
 Solar power stand side closeup.jpg 737 × 1,100; 87 KB
 Solar power stand side topdown.jpg 736 × 1,100; 113 KB
 Solar power thread top.jpg 736 × 1,100; 117 KB
 Sony erocsson p1i.jpg 1,461 × 1,500; 172 KB
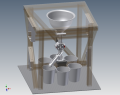 Sorting machine assembly view.png 1,032 × 815; 178 KB
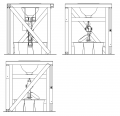 Sorting machine assembly view2.png 1,502 × 1,446; 152 KB
 Sorting machine controller.jpg 1,200 × 794; 272 KB
 Sorting machine feed.jpg 794 × 1,200; 182 KB
 Sorting machine funnel.jpg 1,200 × 794; 174 KB
 Sorting machine tube.jpg 1,200 × 794; 162 KB
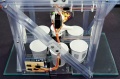
 Sorting machine view.jpg 1,005 × 794; 239 KB
 Sorting machine wheel.jpg 1,200 × 794; 168 KB
 Sorting robot overview.jpg 1,200 × 794; 211 KB
 TBS Cairpiriniha cg.png 768 × 691; 18 KB
 TBS Cairpiriniha front.png 996 × 482; 294 KB
 TBS Cairpiriniha front direct.png 1,385 × 758; 364 KB
 TBS Discovery1.jpg 1,200 × 794; 158 KB
 TBS Discovery10.jpg 1,200 × 794; 192 KB
 TBS Discovery11.jpg 1,200 × 794; 152 KB
 TBS Discovery12.jpg 1,200 × 794; 176 KB
 TBS Discovery13.jpg 1,200 × 794; 149 KB
 TBS Discovery14.jpg 1,200 × 794; 219 KB
 TBS Discovery15.jpg 1,200 × 794; 131 KB
 TBS Discovery16.jpg 1,200 × 794; 170 KB
 TBS Discovery17.jpg 1,200 × 794; 183 KB
 TBS Discovery18.jpg 1,200 × 794; 200 KB
 TBS Discovery19.jpg 1,200 × 794; 213 KB
 TBS Discovery2.jpg 1,200 × 794; 145 KB
 TBS Discovery20.jpg 1,200 × 794; 179 KB
 TBS Discovery21.jpg 1,200 × 794; 247 KB
 TBS Discovery22.jpg 1,200 × 794; 296 KB
 TBS Discovery23.jpg 1,200 × 794; 196 KB
 TBS Discovery24.jpg 1,200 × 794; 245 KB
 TBS Discovery25.jpg 1,200 × 794; 239 KB
 TBS Discovery26.jpg 1,200 × 794; 161 KB
 TBS Discovery27.jpg 1,200 × 794; 117 KB
 TBS Discovery28.jpg 1,200 × 794; 97 KB
 TBS Discovery29.jpg 1,200 × 794; 119 KB
 TBS Discovery3.jpg 1,200 × 794; 198 KB
 TBS Discovery4.jpg 1,200 × 794; 149 KB
 TBS Discovery5.jpg 1,200 × 794; 206 KB
 TBS Discovery6.jpg 1,200 × 794; 126 KB
 TBS Discovery7.jpg 1,200 × 794; 191 KB
 TBS Discovery8.jpg 1,200 × 794; 232 KB
 TBS Discovery9.jpg 1,200 × 794; 137 KB
 TBS Discovery Core installed.jpg 1,200 × 794; 209 KB
 TBS Discovery Core installed front.jpg 1,200 × 794; 95 KB
 TBS Discovery aug2013 1.jpg 1,200 × 803; 149 KB
 TBS Discovery aug2013 2.jpg 1,200 × 803; 151 KB
 TBS Discovery aug2013 3.jpg 1,200 × 803; 122 KB
 TBS Discovery aug2013 4.jpg 1,200 × 803; 175 KB
 TBS Discovery aug2013 5.jpg 1,200 × 802; 203 KB
 TBS Discovery aug2013 6.jpg 1,200 × 803; 172 KB
 TBS Discovery box contents.jpg 1,200 × 794; 307 KB
 TBS Discovery center of gravity.png 568 × 208; 31 KB
 TBS Discovery center of gravity diagram.png 870 × 1,200; 158 KB
 TBS Discovery electronics installation diagram.png 2,000 × 1,439; 228 KB
 TBS Discovery ezuhf rx mainscreen.png 930 × 538; 97 KB
 TBS Discovery ezuhf rx mapping.png 930 × 538; 92 KB
 TBS Discovery flight.jpg 1,083 × 660; 87 KB
 TBS Discovery flight2.jpg 788 × 474; 110 KB
 Tasmota blitzwolf shp7 plug.jpg 2,000 × 1,500; 707 KB
 Tasmota blitzwolf shp7 plug bottom.jpg 2,000 × 1,500; 1.1 MB
 Tasmota blitzwolf shp7 plug relay.jpg 2,000 × 1,500; 688 KB
 Tasmota blitzwolf shp7 plug top.jpg 2,000 × 1,500; 994 KB
 Tasmota blitzwolf shp7 plug wiring bottom.jpg 2,000 × 1,500; 956 KB
 Tasmota blitzwolf shp7 plug wiring top.jpg 2,000 × 1,500; 1 MB
 Tasmota oukitel p2 plug.jpg 2,000 × 1,500; 334 KB
 Tasmota oukitel p2 plug wiring overview.jpg 2,000 × 1,500; 553 KB
 Tasmota oukitel p2 plug wiring top.jpg 1,280 × 960; 254 KB
 Tbs caipirinha logo any.png 1,080 × 365; 75 KB
 Tbs core second battery.jpg 1,200 × 794; 250 KB
 Tbs disco pro install.png 2,000 × 1,397; 339 KB
 Tbs discovery any.png 490 × 183; 43 KB
 Tbs discovery black.png 1,000 × 343; 44 KB
 Tbs discovery cg points.png 488 × 175; 10 KB
 Tbs discovery frame top.png 488 × 196; 27 KB
 Tbs discovery kit.jpg 1,000 × 944; 169 KB
 Tbs discovery pro air.jpg 742 × 422; 105 KB
 Tbs discovery pro kit.jpg 626 × 600; 140 KB
 Tbs discovery white.png 1,000 × 343; 46 KB
 Tek Sumo Flying wing CG calculator.png 760 × 469; 23 KB
 Teksumo rctimer bc2826-10 1400kv 7x4 3s2100.png 956 × 616; 104 KB
 Teksumo rctimer bc2826-10 1400kv 8x4 3s2100.png 958 × 614; 104 KB
 Teksumo rctimer bc2836-6 1500kv 7x4 3s2100.png 954 × 615; 104 KB
 Timing attack 1888 boot success.jpg 554 × 180; 35 KB
 Timing attack degraded.PNG 383 × 373; 9 KB
 Timing attack degraded settings.PNG 374 × 211; 7 KB
 Timing attack dgtool.PNG 669 × 314; 16 KB
 Timing attack schematic.PNG 1,154 × 876; 87 KB
 Timing attack visual representation.png 760 × 551; 92 KB
 Travel Des 2011 Europe.png 524 × 529; 349 KB
 Travel Oct 2012 Europe.png 674 × 742; 560 KB
 Travel denmark map.png 441 × 1,144; 728 KB
 Trex-250-front.jpg 1,100 × 736; 146 KB
 Trex-450-500-600.jpg 500 × 203; 59 KB
 Trex-600-500-450-250.jpg 800 × 533; 90 KB
 Trinket attiny85.png 800 × 800; 170 KB
 Truecrypt.png 204 × 271; 68 KB
 Turnigy Tek Sumo1.jpg 1,147 × 660; 162 KB
 Turnigy Tek Sumo10.jpg 1,200 × 794; 143 KB
 Turnigy Tek Sumo11.jpg 1,200 × 794; 142 KB
 Turnigy Tek Sumo12.jpg 1,200 × 794; 121 KB
 Turnigy Tek Sumo13.jpg 1,200 × 794; 133 KB
 Turnigy Tek Sumo14.jpg 1,200 × 794; 229 KB
 Turnigy Tek Sumo15.jpg 1,200 × 794; 124 KB
 Turnigy Tek Sumo16.jpg 1,200 × 794; 111 KB
 Turnigy Tek Sumo17.jpg 1,200 × 794; 83 KB
 Turnigy Tek Sumo18.jpg 1,200 × 794; 159 KB
 Turnigy Tek Sumo19.jpg 1,200 × 794; 127 KB
 Turnigy Tek Sumo2.jpg 1,200 × 794; 152 KB
 Turnigy Tek Sumo20.jpg 1,200 × 794; 122 KB
 Turnigy Tek Sumo21.jpg 1,200 × 794; 102 KB
 Turnigy Tek Sumo22.jpg 1,200 × 794; 106 KB
 Turnigy Tek Sumo23.jpg 1,200 × 794; 134 KB
 Turnigy Tek Sumo24.jpg 1,200 × 794; 84 KB
 Turnigy Tek Sumo25.jpg 1,200 × 794; 101 KB
 Turnigy Tek Sumo3.jpg 1,200 × 794; 146 KB
 Turnigy Tek Sumo4.jpg 1,200 × 794; 134 KB
 Turnigy Tek Sumo5.jpg 1,200 × 794; 166 KB
 Turnigy Tek Sumo6.jpg 1,200 × 794; 168 KB
 Turnigy Tek Sumo7.jpg 1,200 × 794; 114 KB
 Turnigy Tek Sumo8.jpg 1,200 × 794; 121 KB
 Turnigy Tek Sumo9.jpg 1,200 × 794; 138 KB
 Ue 10 pro.jpg 465 × 249; 35 KB
 Unc-110s-b open.jpg 763 × 480; 58 KB
 Unc-210s-b front.jpg 917 × 406; 50 KB
 Unc-210s-b open.jpg 640 × 415; 44 KB
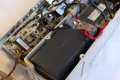
 Ups battery circuit.jpg 1,200 × 803; 268 KB
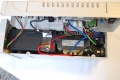
 Ups battery disconnected.jpg 1,200 × 803; 190 KB
 Ups battery disconnected top.jpg 1,200 × 803; 207 KB
 Ups battery installed.jpg 1,200 × 803; 222 KB
 Ups battery inverter.jpg 1,200 × 803; 201 KB
 Ups battery leds.jpg 1,200 × 803; 125 KB
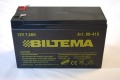 Ups battery new.jpg 1,200 × 803; 159 KB
 Ups battery new top.jpg 1,200 × 803; 125 KB
 Ups battery old.jpg 1,200 × 803; 107 KB
 Ups battery old top.jpg 1,200 × 803; 130 KB
 Ups battery top casing.jpg 1,200 × 803; 117 KB
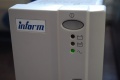
 Ups battery unit.jpg 1,200 × 803; 144 KB
 VEDirect monitoring desk.png 2,444 × 1,766; 431 KB
 VEDirect monitoring device.png 397 × 444; 220 KB
 Victron cable unit pinout.jpg 794 × 553; 148 KB
 Victron vedirect cable diagram.png 687 × 208; 11 KB
 WEP Cracking alfa awus036h circuit back.jpg 1,100 × 737; 160 KB
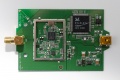 WEP Cracking alfa awus036h circuit front.jpg 1,100 × 737; 249 KB
 WEP Cracking alfa awus036h front.jpg 1,101 × 737; 66 KB
 WEP Cracking arpreplay.png 737 × 274; 70 KB
 WEP Cracking arpreplay packetbuildup.png 737 × 274; 72 KB
 WEP Cracking capture packetbuildup.png.png 737 × 274; 31 KB
 WEP Cracking crack key.png 737 × 274; 65 KB
 WEP Cracking crack key votes.png 737 × 331; 95 KB
 WEP Cracking fakeauth.png 737 × 272; 45 KB
 WEP Cracking find wireless network.png 737 × 329; 81 KB
 WEP Cracking mac monitormode.png 737 × 526; 114 KB
 WEP Cracking start capturing.png 737 × 274; 26 KB
 WPA attack churcofwifi set complete.jpg 1,100 × 736; 242 KB
 WPA attack churcofwifi set overview.jpg 1,100 × 736; 205 KB
 WPA attack churcofwifi set working.jpg 1,100 × 736; 209 KB
 WPA attack supermicro peak power usage meter.jpg 1,572 × 736; 219 KB
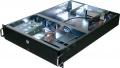
 WPA attack supermicro server gpu left.jpg 1,100 × 736; 238 KB
 WPA attack supermicro server gpu right.jpg 1,100 × 736; 221 KB
 WPA attack supermicro server overview.jpg 1,100 × 736; 210 KB
 WPA attack system status.png 885 × 789; 223 KB
 Wep encryption.png 303 × 214; 13 KB
 Wowgo3 battery 6ah.jpg 800 × 800; 48 KB
 Wowgo3 battery 8ah.jpg 800 × 800; 50 KB
 Wowgo3 bearings zealous.jpg 500 × 540; 32 KB
 Wowgo3 bushings paris.jpg 800 × 800; 25 KB
 Wowgo3 cable battery esc.jpg 1,000 × 1,000; 30 KB
 Wowgo3 case battery.jpg 800 × 800; 28 KB
 Wowgo3 case esc.jpg 800 × 800; 37 KB
 Wowgo3 charger.jpg 800 × 800; 51 KB
 Wowgo3 contents.png 1,000 × 1,000; 606 KB
 Wowgo3 controller esc.jpg 800 × 800; 41 KB
 Wowgo3 deck bamboo fiber.jpg 390 × 620; 14 KB
 Wowgo3 deck black.jpg 800 × 800; 53 KB
 Wowgo3 deck orange.jpg 800 × 800; 54 KB
 Wowgo3 front.jpg 1,000 × 663; 174 KB
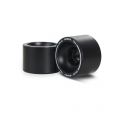
 Wowgo3 hubmotor black.jpg 800 × 800; 34 KB
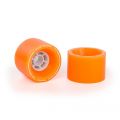
 Wowgo3 hubmotor orange.jpg 800 × 800; 40 KB
 Wowgo3 hubmotor sleeve black.jpg 800 × 800; 26 KB
 Wowgo3 hubmotor sleeve orange.jpg 800 × 800; 24 KB
 Wowgo3 overview.jpg 1,000 × 663; 252 KB
 Wowgo3 overview black.jpg 1,000 × 1,000; 101 KB
 Wowgo3 overview orange.jpg 600 × 600; 29 KB
 Wowgo3 overview orange1.jpg 1,000 × 1,000; 55 KB
 Wowgo3 overview orange2.jpg 1,000 × 1,000; 41 KB
 Wowgo3 overview orange3.jpg 1,280 × 1,280; 62 KB
 Wowgo3 overview orange4.jpg 1,000 × 1,000; 25 KB
 Wowgo3 overview orange5.jpg 1,000 × 1,000; 76 KB
 Wowgo3 rear.jpg 948 × 629; 224 KB
 Wowgo3 rear light.jpg 1,000 × 1,000; 99 KB
 Wowgo3 remote smart.jpg 800 × 800; 22 KB
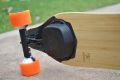
 Wowgo3 truck back.jpg 800 × 800; 40 KB
 Wowgo3 truck paris.jpg 860 × 540; 24 KB
 Wowgo3 under.jpg 1,000 × 663; 152 KB
 Wowgo3 wheel front black.jpg 1,000 × 1,000; 31 KB
 Wowgo3 wheel front orange.jpg 800 × 800; 28 KB
- Wowgo 3 manual.pdf ; 7.09 MB
 Wrt54g jtag header.jpg 800 × 600; 153 KB
 Wrt54g jtag parallel connector.jpg 800 × 600; 72 KB
 Wrt54g jtag parallel finished.jpg 800 × 600; 67 KB
 Wrt54g jtag tftp ping.png 668 × 331; 17 KB
 Wrt54g jtag tftp program.png 668 × 319; 11 KB
 Wrt54g jtag utility erase nvram.png 668 × 535; 28 KB
 Wrt54g jtag utility probe.png 668 × 535; 27 KB
 Wrt54gl sdcard overview.jpg 1,333 × 1,000; 263 KB
 Wrt54gl sdcard pcb gpio.jpg 1,000 × 750; 124 KB
 Wrt54gl sdcard pcb gpio alternative.jpg 1,000 × 750; 124 KB
 Wrt54gl sdcard pcb gpio side.jpg 1,000 × 750; 157 KB
 Wrt54gl sdcard points.jpg 1,000 × 750; 192 KB
 Wrt54gl sdcard points side.jpg 1,000 × 750; 191 KB
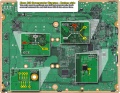 Xbox360 downgrader diagram bottom.jpg 987 × 769; 304 KB
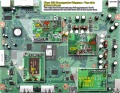 Xbox360 downgrader diagram top.jpg 987 × 769; 317 KB
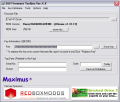 Xbox 360 lite-on 360firmware key.png 556 × 474; 41 KB


