RC Helicopters
Electronic RC helicopters are simpler and easier to maintain than their nitro counterpart. Less parts also means makes it possible to make smaller scale models. Battery longevity has never been better with the latest Lithium Polymer (LiPo) technology.
Radios
- Futaba 6EX 2.4GHz - Review
- Futaba 7C 2.4GHz - Review
- Spectrum DX7 - Timer, subtrims, and deidcated idle curve switch [1]
Chargers
- Bantam BC-6 Multi-Chemisty Battery - Recmd Review Vs EOS0606i
- Hyperion EOS0606i AC/DC 6S 6A 220V/12V
- Align RCC-6CX
- Hyperion EOS 0403i DC 4S 3A
Be aware of clones manufactured by iMax and Turnigy.
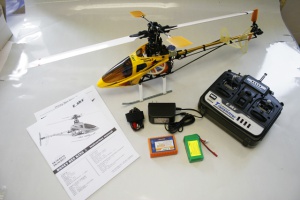
ESky Honey Bee King 2 Yellow
Only researched
The Honey Bee King 2 is a cool little micro-helicopter with a belt driven tail rotor. Parts are easy to get.
Specification
- Length: 535mm
- Height: 225mm
- Main blade diameter: 600mm
- Tail blade diameter: 130mm
- Motor gear: 9T
- Main drive gear: 140T
- Drive gear rate: 9:140T
- Weight: 470g (with 1000mAh,11.1V)
References
- Flight Training
- Radds school of rotary flight
- Yellow King 2 kit
- Nybegynner Guide
- Esky English
- RCGroups King v2 Thread
- ZOOM Microheli
- E-sky Honey Bee King 2 førstekjøp
- Esky King 2 Testing Flight
- ESky adjustment videos
T-Rex 450 SE v2
Only researched
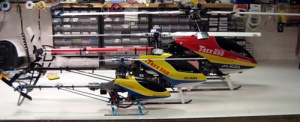
The T-Rex 450 series is a micro helicopter, slightly larger than the King 2. All carbon frame and metal head and tail parts. The second revisions improved the central shaft, bearings, and some minor details. The 450 series has evolved and improved based on the parent model.
References
- Different T-Rex models
- T-Rex Wikipedia
- Trextuning.com
- LiPo battery charging and safety guide
- Mercury Adhesives Caddy and Adhesives Set Review
T-Rex 250
Ordered 18th April 2009 and built throughout April and May
This is a new 200 series micro-helicopter from Align, announced in late 2008. Engineered to the quality expected for a T-Rex. There were a few initial problems with the tail but it was quickly handled and fix with a new metal replacement.
The build requires extra attention to details and precision when setting up the links, angles, aligning, and leveling due to the small scale of the helicopter.
My Kit
- T-Rex 250 Super Combo
- Updated tail grip, 1 bearing (instead of 2)
- CF frame 1.2 mm (instead of 1.0 mm
- Hex screws 0.9 mm (still old, newer models have 1.3 mm)
- Spektrum DX7 heli transmitter, incl. 9.6V 1500 mAh NiMH battery
- Spektrum AR6100e 6 channel micro-receiver
- Outrage 860 mAh and Thunder Power 910 mAh batteries
250 SE
In late August 2009 Align released the improved T-Rex 250 SE. The main differences are a full shiny CNC metal head, improved CCPM plate for better 3D, metal levers, upgraded tail with grip weights, exchangeable main gear, new 250SP motor, and new anti-rotation guide. It's a revised T-Rex 250, all the new parts are available as upgrades.
- Official Align T-Rex 250SE product page
- Align forum T-Rex 250SE news posting - translated from Chinese
Setup
Upgrades
| Item | Stock | Upgrade / Replacement [2] |
|---|---|---|
| Swash Servos | Align DS410 |
Hitec HS-65MG [3] |
| Tail Servo | Align DS420 |
JR DS290G / DS380G in uk |
| Receiver | None | Spektrum AR6100/AR6100E |
| Battery | None | Thunder Power 910 mAh 3S / Outrage 860 mAh 3S |
| Motor | Align RCM-BL250 3400KV 9-pole | Scorpion HK-2208-3600 |
| ESC | Align RCE-BL15X 15A JST |
YGE 1+ProgCard [7] |
| Gyro | Align GP750 |
Spartan DS760 [8] |
| Pinion | 15T |
Venom 16T (3D) Align 16T |
| Receiver Power | ESC BEC | Stock |
| Other upgrades |
Body and main rotor |
- Align T-Rex 250 most sold parts list - lower left menu
List of third-party spare part and upgrade part manufacturers:
- Xtreme Production - Shop: Miracle Mart - Making metal replacements of tail control link, main shaft blocks, tail boom mount, tail servo mount, battery mount, and swash guide
- Infinity Hobby [37] - Making custom carbon fiber boom and skids, and lots more
- Microheli - Shop: Flying Hobby HK - Metal anti-rotation guide, and various aftermarket parts
- Flying Sport - Shop: Helidirect page - Carbon fiber tail rod
Things to note
- ESC comes with JST plug for the battery, maybe change to a higher rated 50A Deans connector for less heat, larger connector surface
- Add a piece of zip tie between the tailboom pushrod to secure
- Threadlock to all metal-to-metal screws, only a slight drop on the tip of the screw
- Use purple threadlock on most high-service areas and blue threadlock on other essential areas (head, engine, tail) or all, green threadlock on outer rim of bearings, red permanent threadlock on really essential areas (not really needed on T-Rex)
- Use CA super glue for all metal-to-plastic screws
- Add silicone shock oil to the belt to ease and smoothen the movement, eliminates build-up of static electricity
- Silicon spray for the belt, TriFlow oil for shafts/bushings, White lithium grease for servos, General grease for bearings [38]
- Only use petroleum oil on metal-to-metal parts, most plastic types will weaken when exposed
- When threading the ball links, plier on the link and turn the plastic link
- If servo head is not aligning horizontal as expected, turn it 180 degrees
- Mount battery with connector cables sticking out towards the rotor shaft
- Leave enought space between pinion and main gear that a piece of paper could pass through
- Don't use trim on the trail rotor pitch, confuses the gyro
- Make sure no servo linkage is binding to avoid servo tear/heat-up [39]
- Avoid binding by moving link rod a hole further in, less travel range
- The balance wire on some batteries can break, put the balance wire along-side the battery with a piece of tape [40]
- Fly a few times to break in the heli, especially the links, less twitchy
- Keep the ESC away from the gyro and possibly also the transmitter to minimize interference, 3-5 cm [41]
- Also keep the servo and gyro signal wires away from the ESC and engine power wires [42]
- Use the outter-most hole on the longest servo arm for the swash-servos, links rods perpendicular to the horn [43]
- Although ESC is pre-programmed, do the setup to make sure the throttle range matches transmitter and any problems during manufacturing [44]
- A good battery pack has the ability to hold voltage under load, some battery pack will drop voltage, resulting in bogging of head speed [45]
- Be careful when removing the battery from the velco to avoid cracking the battery mount [46]
- Most usual crash repair parts to get: main shafts, feathering spindles, blades, skids, flybar, tail belt, and ball links [47] [48] (left side, down)
- Broken engine can cause ESC to die, check all 3 engine wires using ohm-meter, great variety between each wire indicates defect engine [49]
- Always put on the ball links with the same orientation, the side with the text pointing outwards
- When adjusting link length, only do full turns, no half turns, the link head has different sides and construction
- Use 3S (series) batteries, 2S batteries doesn't have enough punch for proper headspeed
- Try 0-100-100-100 throttle in normal mode when regular hovering is problematic
- Solder Deans female connector on battery, male on speed controller
- During gyro initialization, keep the heli still and no transmitter stick input
- After extended use replace main shaft head screw, high-speed/stressed bearings, and worn-down parts
Checklist and maintenance
- Check mixer nuts and bolts in head and tail
- Inspect screws and alignment of main blades, flybar, and tail blades
- Move feathering shaft to check dampeners
- Check all ball links for slop or play
- Check tail belt tension
- Fully charged batteries, both heli and radio
- Radio range check and trim settings
- Make sure gyro, receiver, and esc is mounted securely
- Inspect power and servo wiring
- Perform full cyclic throw on all servos, watch swashplate movement
- Switch to Normal mode, Throttle-hold on, low throttle stick, then connect power
- Start a timer to notify when the battery is depleted
References
Builds and reviews
- Elefun T-Rex 250 review
- T-Rex 250 Super Combo Feb 2009 manual - pdf
- T-Rex 250 Combo Feb 2008 manual - pdf
- T-Rex 250 build thread - Steph280 setup
- T-Rex 250 Super Combo Review
- Changed to - Trex 250 build pics
- arky's T-Rex 250
- RC Heli magazine review march 2009
- jasmine T-Rex 250 build videos
- Jermo's DX7 Setup Video
- T-Rex 250 Build Tips
- Bob Finless White T-Rex 250 build videos - excellent
Other
- 7C vs DX7
- Official Align 250 product page
- Mini-HowTo - Align GP-750 Heading Lock Gyro
- The T-Rex 250 new products thread
- Align T-Rex 250 Tail Oscillations: Solved
- How to use a pitch gauge
- Helicopter Transmitter Setup - Spektrum DX7 - video
- Innstilling av Throttle og Pitch-kurven
- CCPM Helicopter Setup
- Head Lock vs Rate Gyro Mode - video
- Bob White video review and guides - HeliFreak Summary post - excellent resource
- Spektrum DX7 - Step-by-Step Bearing Mod - Bearings
- HeliFreak T-Rex 250 pics and Videos
- Which stock blades on Trex 250
- RC Helicopter Pre Flight Checklist
Spare Parts Suppliers
Community sites
Useful sites
- RC Heli Wiki
- LiPo Wiring
- Trex Tuning
- RC Heli Resource
- Bert Kammerer - great guy
