Turnigy Tek Sumo
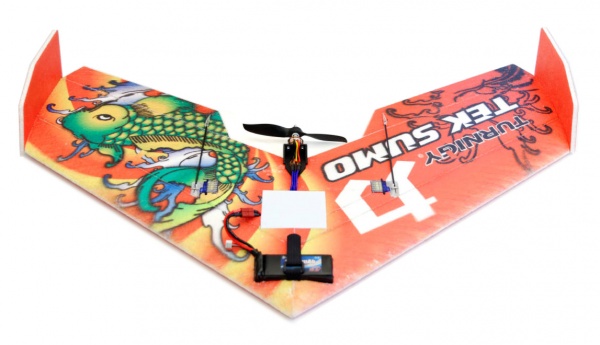
The Tek Sumo is a flying wing with an impressive range of flying characteristics. It is light weight but includes spars to reinforce the two wing halves.
Specifications
- Released: Fall 2011
- Type: Powered medium sized flying wing
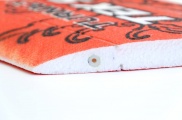
- Airframe: Rough EPP (Expanded Polypropylene) foam - rubbery
- Wingspan 900 mm - 920 mm (measured)
- Wing area: 252 dm^2
- Length: 575 mm - 570 mm (measured)
- Root chord: 290 mm (excl. elevons) - 345 mm (incl. elevons) [1]
- Tip chord: 205 mm (excl. elevons) - 270 mm (incl. elevons)
- Sweep: 315 mm (front to tip difference)
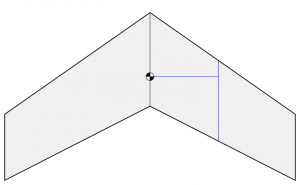
- Center of gravity: 200-212 mm (instructions), range 190-212 mm, from leading edge/tip - aim for 210 mm [2]
- Stock weight: 230 grams (wings, winglets, motor mount, servo mount, push rods, linkage, carbon fiber rods, front padding)
- Elevon travel range (radio programmable):
- Elevator: +-10 mm
- Aileron: +-15 mm
- Payload capacity: 100-250 grams (at least, CoG and power setup dependant)
- Reinforcement: Black carbon fiber spars, two 2x530 mm 1.9 gram wing spars, three 2x160 mm cross spars, two 3x320 mm elevon spars
- Recommended flying area: 250x250 meters [3]
- Product page: HobbyKing Tek Sumo
Manual
- Manual for Tek Sumo - Official manual
- Manual for HobbyKing F-40A ESC - For programming the controller
Similar models
Stock kit
The kit from HobbyKing will include the essential parts to put together the airframe, including push rods and repair tape.
- 1x Tek Sumo 2 wing halves
- 2x Pre-glued carbon fiber rods 2 mm on wings top and bottom
- 2x Pre-glued carbon fiber rods 3 mm on elevons bottom
- 2x Winglets
- 1x Front EPP padding block
- 2x Push rods 1 x 200 mm
- 2x Glassfiber control arm 21 mm
- 2x Linkage stopper 1.5 x 6 mm
- 4x Equipment bay plastic bands 250 mm
- 3x Carbon fiber rods 2 x 160 mm
- 1x Plywood motor mount 38 x 38 mm backplate 23 x 23 mm pattern
- 2x Plywood servo mount 23 x 12 mm
- 1x Plywood velcro battery mount 71.5 x 25 mm
- 1x Fiberglass reinforced tape 15 mm
- 1x Instruction manual 4 pages
My setup
Base setup
This is the current setup, as of 2012-02-08:
- Motor: RCTimer BC2826-10 1400 Kv 205W outrunner motor
- Propeller: APC 7x4E propeller with 5.0 mm collet adaptor for 3.17 mm shaft
- More trust: APC 8x4E propeller with 5.0 mm collet adaptor for 3.17 mm shaft
- More speed: APC 6x4E propeller with 5.0 mm collet adaptor for 3.17 mm shaft
- ESC: RCTimer 30A Brushless Programmable ESC with T-type Deans and 3.5 mm bullet connectors
- Servos: HexTronik HXT900 Blue 9 gram digital servos
- Receiver: Spektrum AR7000 7 channel receiver
- Transmitter: Spektrum DX7 DSM 7 channel transmitter
- Battery: Moxie 2200 mAh 3SP1 11.1V Lithium-ion Polymer 190 gram battery
Upgraded setup
Possible future upgrades. The control link is upgraded to a FrSky kit to extend the range and reliability. Motor upgraded to a stronger BC2836-6 1500 Kv outrunner and 8x4E propeller.
- Motor: RCTimer BC2836-6 1500 Kv 368W outrunner motor
- Propeller: APC 7x4E propeller with 5.0 mm collet adaptor for 3.17 mm shaft
- More speed: APC 7x5E propeller with 5.0 mm collet adaptor for 3.17 mm shaft
- More thrust: APC 8x4E propeller with 5.0 mm collet adaptor for 3.17 mm shaft
- Note: APC 8x4E propeller requires 40A ESC
- ESC: RCTimer 30A Brushless Programmable ESC with T-type Deans and 3.5 mm bullet connectors
- Or: HobbyKing F-40A 40A Brushless Programmable ESC with T-type Deans and 3.5 mm bullet connectors - manual
- Servos: HexTronik HXT900 Blue 9 gram digital servos
- Receiver: FrSky D6FR 2.4 GHz ACCST 6 channel two-way receiver
- Transmitter: Spektrum DX7 radio with FrSky DHT 2.4 GHz 60mW transmitter
- Battery: Turnigy nano-tech 2200mah 35~70C 3SP1 11.1V Lithium-ion Polymer 189.4 gram battery
FPV setup
- Camera: Security Cameras 2000 PZ0420 600TVL camera
- Video transmitter: Best Offer Buy BOB ESXF700mW SR-700MW 1.2GHz 700mW 12V blue/purple transmitter
- Antenna: Standard dipole antenna
- Antenna: Tuned RG316 single dipole antenna
- Video receiver: Best Offer Buy Comtech module 12V receiver
- Antenna: Standard dipole antenna
- Goggles: FatShark Dominator FPV goggles
- Display: MacBook Air with EasyCAP DC60 USB video capture adapter
- Other: LPF-01 Common mode LC power filter, 3S 2200mAh batteries, custom made power cables, composite video splitter
Tips and tricks
- To glue the wing halves together and motor mount, use PU (Polyurethane) glue, e.g. Gorilla Glue, activate with water and keep pressed together using tape
- For attaching the winglets use hot glue in the main contact surfaces and silicone glue (GOOP) around the bead [4] [5]
- For better FPV signal conditions, replace the carbon fiber rods (1.9 gram) with 2 mm fiber glass rods (4.8 gram) on the wings and center spars, they're easy to undo, use thick super glue
- Use servo cable extensions to reach the servos from the equipment bay
- Reinforce the motor mount with super glue and kicker, paint it black for smoother appearance
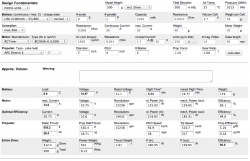
- Calculate the motor and propeller size for the desired air speed, flight time and efficiency, use eCalc
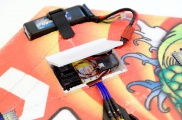
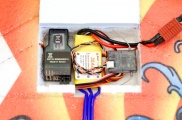
- Make incisions to remove the floor in the equipment bays, make it even thinner and use PU glue+tape to re-attach the floor on the opposite side
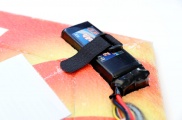
- Put the equipments on the top side using the tip above to move the floors
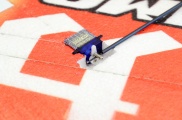
- Relocate the servo holes to be perpendicular to the forward motion direction of the wing, position the servos horizontal (not vertical), double-sided adhesive pad+tape or hot glue, less drag [6]
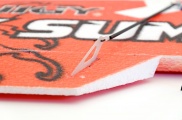
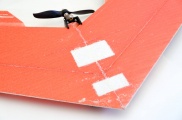
- Use glass fiber reinforced tape to cover servo wire trails
- Cut a hallow 2 mm carbon fiber tube to fit over the push rod to minimize flexing
- On the tip of the elevons, cut off the corner to avoid the obstruction with the winglet
- Detach the elevons using a razor blade and reattach using strong 3M Mailing and Storage tape for optimal frictionless motion
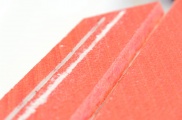
- Reinforce the front tip of the wing by inserting two 3 mm x 110 mm carbon fiber rods into the foam from each side, pre-fit and use PU glue
- Scorpion, Hacker, Cobra are all reported to be very good motors if you want better quality [7]
- Fine tune the CoG (center of gravity) using the battery and motor as weights
- Pick a suitable motor+battery combination, simple rule: motor weight / 0.025 = battery capacity+-100 mAh, battery capcity * 0.025 = motor weight+-5g
- Center of gravity point is 190 to 212 mm from the front of the nose, depending on battery and total weight, aim for 210 mm [8]
- Program the travel range of the elevator to be 15 mm up and down, and the aileron to be 10 mm up and down from default position
- To maximum mechanical range (sensitivity) on the servo throws, use the outer most hole on the elevon control arm and the inner most on the servo arm
- To ease the sensitivity of the elevons, try 40% elevator expo and 80% aileron expo [9]
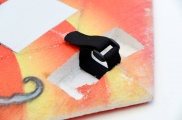
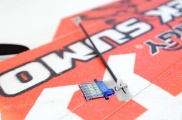
- Add a small sheet of coroplast and magnets to cover the equipment bay, use a 2 mm rod thought the flute hinge and PU or superglue for the magnet/metal piece
Motor alternatives
Scorpion, Hacker, Cobra offer quality motors, but the priority here is low cost.
- RCTimer BC2826-10 1400KV Outrunner Brushless Motor, 50g [10]
- Turnigy D2826-10 1400KV Brushless Motor, 50g
- HK2824-1300 HobbyKing 2824 1300Kv Brushless Outrunner 52g [11]
- L2205-1350 Turnigy L2205-1350 1350Kv Brushless Motor 30g, pair with 1300 mAh [12]
- D2822/14 Brushless Outrunner 1450kv 38g, pair with 1500 mAh [13] [14]
- Tower Pro 2409-12t 1600kv 63g, heavy [15] [16]
- RCTimer A2208-12 1800KV Outrunner Brushless Motor 38g, pair with 1800 mAh [17]
- RCTimer BC2826-6 2200KV Outrunner Brushless Motor 50g, pair with 2200 mAh [18] [19]
- Turnigy NTM Prop Drive Series 35-30A 1400kv Brushless Outrunner [20]
- Turnigy 2836 Brushless EDF Motor 3200kv 72g [21]
Setups
Optimal power train around 200-300W [22].
Guides
- 3DZone Center of Gravity guide
- Web-o-Calc propeller recommendation
- eCalc for propeller airplanes
- Propeller rule [23]:
- Bigger prop - lower Kv motor, less amps, more thrust/climb
- Smaller prop - higher Kv motor, more amps, less thrust/climb, more pitch speed
Common setups
- Docile/easy: Motor 1350 Kv D28xL19mm 40g, APC 7x4, 3S 1000mAh 83g [24]
- Cruising/easy: Motor 1450 Kv D28xL22mm 38g, APC 8x6, 3S 2200 mAh 170g [25]
- Cruising/FPV: Motor 1800 Kv D28xL22mm 38g, APC 7x4, 3S 1800 mAh 153g, 15-20 min flight [26]
- Cruising/FPV: Motor 1400 Kv D28xL26mm) 50g, APC 8x4, 3S 1500 mAh 138g, 15-20 min flight [27]
- Performance/long: Motor 1600 Kv D31xL31mm 63g, APC 7x6/8x4, 3S 2200 mAh 138g [28]
- Performance/speed: Motor 2200 Kv D28xL26mm 50g, APC 6x4, 3S 1500 mAh 138g, 10 min flight [29]
- Ultra/long: Motor 1400 Kv D35xL32mm 88g, APC 8x8, 2x 3S 2200 mAh 340g, 18-25 min flight [30]
- Ultra/fast: Motor 3200 Kv D28xL38m) 72g, APC 7x6, 3S 2200 mAh 170g [31]
Propellers
Common propeller sizes:
- 6x4, 7x3, 7x5, 7x6, 8x4, 8x8
Other equipment
- FeiYu Tech FY-21AP Gyro Stabilizing and autopilot [32]
- FeiYu Tech FY30A IMU Stabilizer [33]
- OpenPilot Stabilization [34] [35]
Flying weight
- 350 grams - setup 2208 1370 Kv, 20A ESC, 3S 1200 mAh, 6x5 [36]
- 489 grams - setup 2818 1350 Kv, 18A ESC, 3S 1800 mAh, 7x4 [37]
Build guides
- Flitetest Tek Sumo and Bonsai review
- bluegsxr6 Tek Sumo setup
- PaulT Tek Sumo build
- yarg Tek Sumo configuration suggestions
- octane81 Tek Sumo build [38]
- FPV Tek Sumo high speed mountain flyer [39]
- planex Tek Sumo setup
- FPV Sweden Tek Sumo build log
- XJet Tek Sumo RC plane of the week
- Rellik Demanon Tek Sumo setup
- beemerdon homemade balancing stand
- Joey6 Tek Sumo build and repair
- Tek Sumo and Zephyr compared
Tools
References
Gallery
Stock
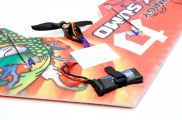
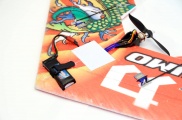
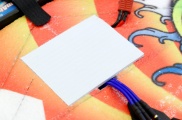
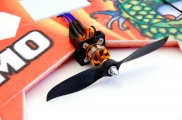
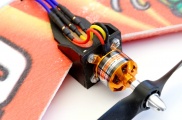
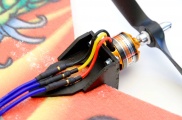
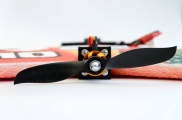
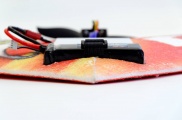
The photos below show my setup of the Tek Sumo, as of April 2012. The idea was to build it after the Zephyr wing principles and to make it as aerodynamic as possible.
