Xbox 360 BenQ VAD6038 Flash: Difference between revisions
No edit summary |
No edit summary |
||
| Line 39: | Line 39: | ||
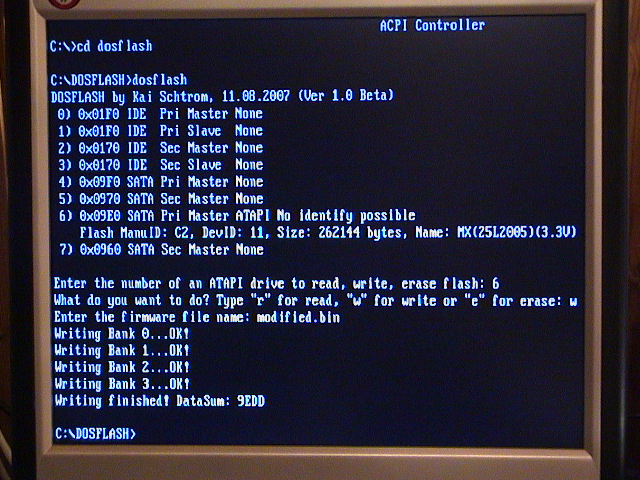
== Write Flash == | == Write Flash == | ||
To flash the drive, replace 'r' with 'w' | To flash the drive, follow in the procedure above but replace 'r' with 'w' to write a new firmware instead. | ||
[[Image:Benq flash write.jpg]] | [[Image:Benq flash write.jpg]] | ||
Revision as of 17:29, 30 September 2007
For a few months the new BenQ VAD6038 drive for the Xbox 360 couldn't be dumped or flashed. A new DosFlash tool by Schtrom made it possible to access the drive flash memory.
DosFlash
Download the DosFlash tool [1] and put the DosFlash files from the DosFlash16 folder on a working MS-DOS boot disk [2].
Install Switch
For the DosFlash application to read the BenQ flash memory, the power to the flash memory has to be applied after DosFlash discovered the drive. The purpose of this is to go around the FirmGuard and jump into the flash memory right before the FirmGuard protection is enabled.
By keeping the the power disconnected from the flash memory after the main power to the drive is connected, the FirmGuard can be circumvented. FirmGuard is not enabled and DosFlash can freely read the content.
Cut Traces
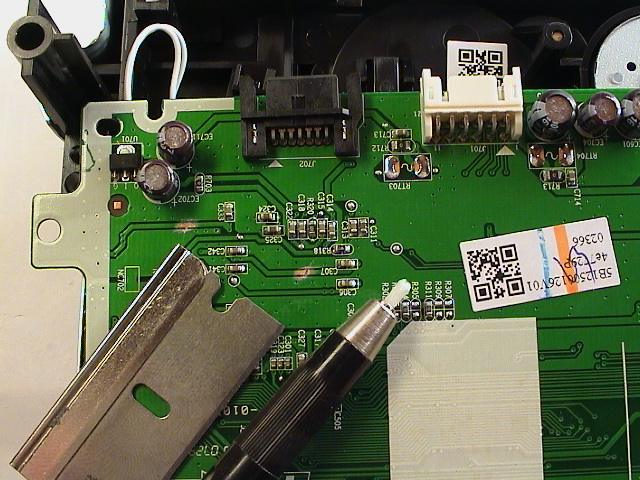
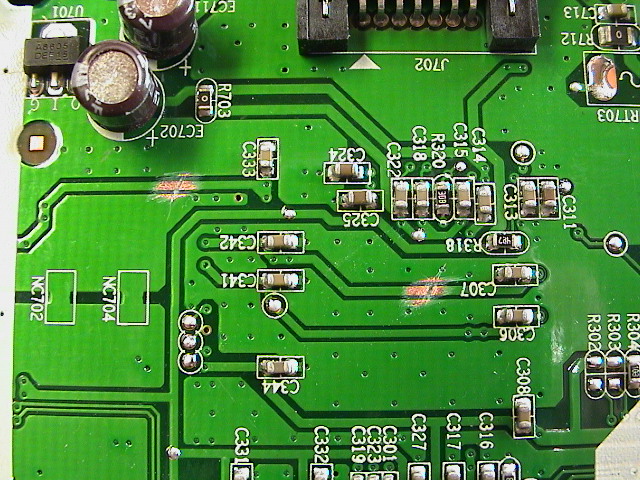
Two traces has to be cut to install a simple switch. The traces are on the bottom side of the circuit board, facing down into the drive. Unmount the circuit board from the drive.
I used a razorblad to cut the traces and a fiber pen to scratch the coating to expose the copper.
Solder Switch
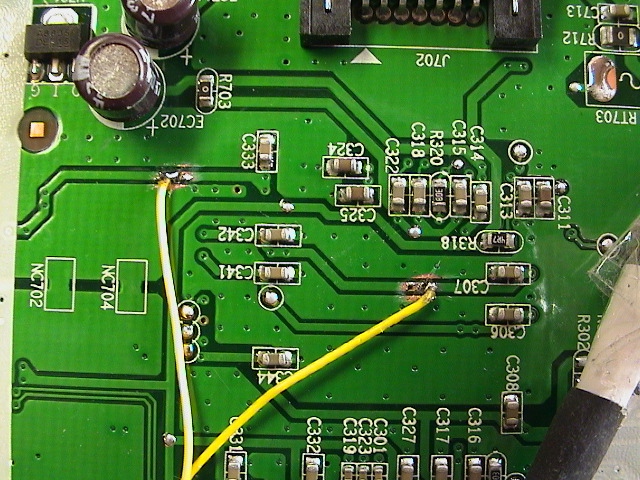
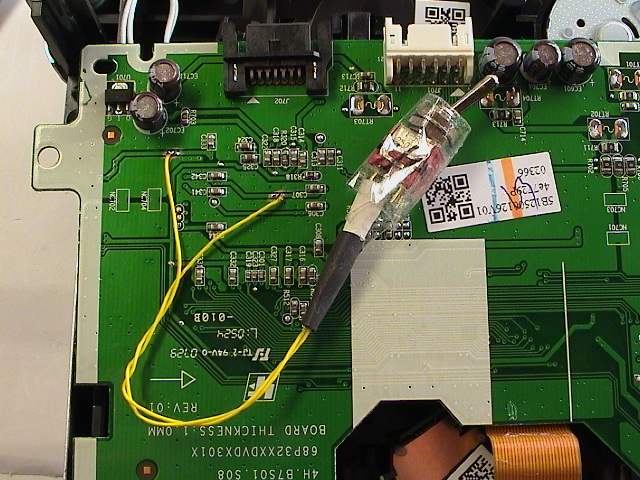
Solder two short wires to the traces facing away from the cut and each other, as seen in the picture below. Connect the ends to a simple on/off switch.
Read Flash
Disconnect the drive from the computer if it's connected and turn the switch to OFF-position.
- Boot MS-DOS and connect the SATA cable to the computer.
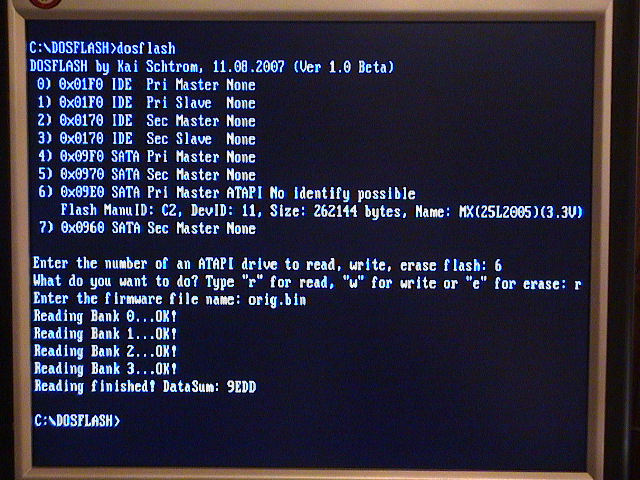
- Execute DosFlash.exe and wait for it to finish searching for drives.
- Connect the power cable to the BenQ drive.
- A second later turn the switch to ON.
- In DosFlash, enter the number of the discovered drive, normally '6', press enter.
- To read the firmware, press 'r', and enter a new filename to dump the firmware.
- The drive should now be dumping the 4 banks, reboot into Windows when done.
Write Flash
To flash the drive, follow in the procedure above but replace 'r' with 'w' to write a new firmware instead.
