EzUHF radio control system: Difference between revisions
| (12 intermediate revisions by the same user not shown) | |||
| Line 1: | Line 1: | ||
The ImmersionRC EzUHF is a 433MHz switchable 200mW or 600mW output one-way wireless control system. Suitable for long range (10km+) and critical situations where a good remote control link is required. | [[Image:EzUHF_boxes.jpg|500px|right]]The ImmersionRC EzUHF is a 433MHz switchable 200mW or 600mW output one-way wireless control system. Suitable for long range (10km+) and critical situations where a good remote control link is required. | ||
* [http://www.immersionrc.com/EzUHF.htm ImmersionRC EzUHF product page] | * [http://www.immersionrc.com/EzUHF.htm ImmersionRC EzUHF product page] | ||
== EzUHF transmitter == | == EzUHF transmitter == | ||
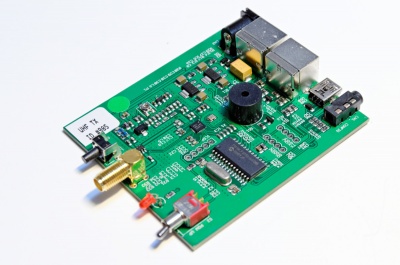
* Model: EzUHF 200/600mW Transmitter silver | * Model: EzUHF 200/600mW Transmitter silver[[Image:EzUHF_transmitter_board.jpg|400px|right]] | ||
* Purchase date: 2012-08-22 | * Purchase date: 2012-08-22 | ||
* Transmitter ID: 985 | * Transmitter ID: 985 | ||
| Line 28: | Line 28: | ||
[[Image:ezuhf_spectrum_norway.png|250px]] | [[Image:ezuhf_spectrum_norway.png|250px]] | ||
== Drivers == | == Drivers == | ||
| Line 36: | Line 33: | ||
== Software == | == Software == | ||
The ImmersionRC software is quite good and fairly straightforward. The receiver tab include a simplified spectrum analyzer, very useful to determine | The ImmersionRC software is quite good and fairly straightforward. The receiver tab include a simplified spectrum analyzer, very useful to determine the condition of the RF environment. Here I picked the 436-438MHz range to get a considerably cleaner band. | ||
[[Image:ezuhf_spectrum_analyzer.png|500px]] | [[Image:ezuhf_spectrum_analyzer.png|500px]] | ||
| Line 47: | Line 44: | ||
# Turn on the receiver and hold the bind pushbutton on the receiver for 5 seconds | # Turn on the receiver and hold the bind pushbutton on the receiver for 5 seconds | ||
# Move the sticks and check the control output on the receiver | # Move the sticks and check the control output on the receiver | ||
== Failsafe == | |||
The UHF receiver will wait 1 second before jumping into failsafe mode if the transmitte signal is lost. To set the failsafe paramters do the following: | |||
# Position the sticks in the desired failsafe configuration, e.g. throttle low, slight down elevator and slight aileron turn - on multirotor make sure to adjust the travel range for the flight mode switch to land inside the "Failsafe" zone so that the flight controller knows that it has lost signal | |||
# Hold the EzUHF transmitter bind button until a series of single beeps are heard, release button - this can be done on the ground or in the air - the failsafe values are saved by the receiver | |||
''Important:'' when using a multirotor and NAZA, this has to be done on the ground when the flight mode channel is trimmed to trigger one of the NAZA failsafe zones - use the NAZA Assistant to view these zones | |||
== Firmware upgrade == | == Firmware upgrade == | ||
| Line 64: | Line 68: | ||
Receiver: | Receiver: | ||
# Disconnect any power from the R/C model, power is supplied by the USB connection | |||
# Hold the pushbutton next to the servo-headers using a plastic tool | # Hold the pushbutton next to the servo-headers using a plastic tool | ||
# Plug in the USB cable and install the new Immersion RC Custom USB Device driver | # Plug in the USB cable and install the new Immersion RC Custom USB Device driver | ||
| Line 70: | Line 75: | ||
# Pick the correct .fw-receiver firmware (Rx8ch) and upload the code, should take about 10-20 seconds | # Pick the correct .fw-receiver firmware (Rx8ch) and upload the code, should take about 10-20 seconds | ||
# Unplug the USB cable and re-insert it to load the new firmware, configure it using the IRC tool | # Unplug the USB cable and re-insert it to load the new firmware, configure it using the IRC tool | ||
# Re-bind the receiver with the transmitter | # Re-bind the receiver with the transmitter and more importantly configure the failsafe | ||
# Lastly, enter firmware mode again and hit Fix Fuses to make sure everything is set up | # Lastly, enter firmware mode again and hit Fix Fuses to make sure everything is set up | ||
Latest revision as of 21:55, 19 November 2014

The ImmersionRC EzUHF is a 433MHz switchable 200mW or 600mW output one-way wireless control system. Suitable for long range (10km+) and critical situations where a good remote control link is required.
EzUHF transmitter
- Model: EzUHF 200/600mW Transmitter silver
- Purchase date: 2012-08-22
- Transmitter ID: 985
- Stock firmware version: 1.25a (6)
- Upgraded firmware version: 1.25b (6)
- Frequency band selected: 436-438MHz
Print a label with the unique transmitter ID and put it on the transmitter. Makes it easier to check if any neighboring EzUHF flyers use the same ID.
EzUHF receiver
- Model: EzUHF Receiver
- Purchase date: 2012-08-22
- Channels: 8
- Diversity: two dipole antennas
- Stock firmware version: 1.24 (6)
- Upgraded firmware version: 1.25b (6)
- Frequency band selected: 436-438MHz
Spectrum Norway
The spectrum space in Norway follows most of the European line of distribution. The entire 430-438MHz band is dedicated for amateur use.

Drivers
The driver install is not straight forward, at least not on Windows XP. The USB driver failed to install and a manual driver update had to be done, poin the path to c:\Program Files\ImmersionRC\ImmersionRCTools.
Software
The ImmersionRC software is quite good and fairly straightforward. The receiver tab include a simplified spectrum analyzer, very useful to determine the condition of the RF environment. Here I picked the 436-438MHz range to get a considerably cleaner band.

Bind
To configure the receiver to listen for the transmitter, perform the following binding procedure:
- Toggle the transmitter power switch to Low
- Hold the bind pushbutton while turning on the transmitter
- Turn on the receiver and hold the bind pushbutton on the receiver for 5 seconds
- Move the sticks and check the control output on the receiver
Failsafe
The UHF receiver will wait 1 second before jumping into failsafe mode if the transmitte signal is lost. To set the failsafe paramters do the following:
- Position the sticks in the desired failsafe configuration, e.g. throttle low, slight down elevator and slight aileron turn - on multirotor make sure to adjust the travel range for the flight mode switch to land inside the "Failsafe" zone so that the flight controller knows that it has lost signal
- Hold the EzUHF transmitter bind button until a series of single beeps are heard, release button - this can be done on the ground or in the air - the failsafe values are saved by the receiver
Important: when using a multirotor and NAZA, this has to be done on the ground when the flight mode channel is trimmed to trigger one of the NAZA failsafe zones - use the NAZA Assistant to view these zones
Firmware upgrade
The firmware upgrade process is simple and recommended to keep the units up-to-date. Make sure to test the units properly after upgrading the firmware to find any new quirks.
Transmitter:
- Start by disconnecting the radio power to the transmitter, USB will provide the power during flashing
- Remove the antenna, switch the power switch to High and hold the pushbutton
- Plug in the USB cable and install the new Immersion RC Custom USB Device driver
- The red LED should start blinking
- In the IRC tool, the Update Firmware button should now be activated, uncheck Preserve Configuration for a full restore
- Pick the correct .fw-receiver firmware (Tx500) and upload the code, should take about 10-20 seconds, a sequence of beeps indicates it's done
- Mount the antenna and re-plug the USB cable to load the new firmware, configure it using the IRC tool
- Lastly, enter firmware mode again and hit Fix Fuses to make sure everything is set up
Receiver:
- Disconnect any power from the R/C model, power is supplied by the USB connection
- Hold the pushbutton next to the servo-headers using a plastic tool
- Plug in the USB cable and install the new Immersion RC Custom USB Device driver
- The red LED should start blinking
- In the IRC tool, the Update Firmware button should now be activated, uncheck Preserve Configuration for a full restore
- Pick the correct .fw-receiver firmware (Rx8ch) and upload the code, should take about 10-20 seconds
- Unplug the USB cable and re-insert it to load the new firmware, configure it using the IRC tool
- Re-bind the receiver with the transmitter and more importantly configure the failsafe
- Lastly, enter firmware mode again and hit Fix Fuses to make sure everything is set up
