Solar Power: Difference between revisions
(→Stand) |
(→Parts) |
||
| (10 intermediate revisions by the same user not shown) | |||
| Line 2: | Line 2: | ||
== Parts == | == Parts == | ||
BOM: | [[Image:Solar_power_panel.jpg|250px|right]] | ||
Bill of materials (BOM): | |||
* 2x [http://www.powerfilmsolar.com/products/custom/?voltages=ALL_PRODUCTS PowerFilm MPT6-150 6.0V 100mA photovoltaic modules] - maximum output 200mA | * 2x [http://www.powerfilmsolar.com/products/custom/?voltages=ALL_PRODUCTS PowerFilm MPT6-150 6.0V 100mA photovoltaic modules] - maximum output 200mA | ||
* 1x [http://www.solarbotics.com/products/d3/ Low Voltage Schottky 1A diode] | * 1x [http://www.solarbotics.com/products/d3/ Low Voltage Schottky 1A diode] | ||
| Line 24: | Line 24: | ||
== Stand == | == Stand == | ||
To house all the components, I built a stand out of two sheets of plexi-glass, a threaded rod, nuts | To house all the components, I built a stand out of two sheets of plexi-glass, a threaded rod, a few nuts and washers. | ||
Solar modules like to face the sun (for some reason) and a 90-60-30 degree triangle should work fine to tilt it in the general direction of the sun on daytime. The modules would be fastened on the hypotenuse between the 30 and 60 degree angles. Pythagoras helped to figure out the correct measurements. | Solar modules like to face the sun (for some reason) and a 90-60-30 degree triangle should work fine to tilt it in the general direction of the sun on daytime. The modules would be fastened on the hypotenuse between the 30 and 60 degree angles. Pythagoras helped to figure out the correct measurements. | ||
| Line 34: | Line 34: | ||
You can download the hand sketches [http://beta.ivancover.com/solar_power/hand_sketches.pdf here]. | You can download the hand sketches [http://beta.ivancover.com/solar_power/hand_sketches.pdf here]. | ||
BOM: | Bill of materials (BOM): | ||
* 2x 30x20x0.3 cm plexi-glass sheets | * 2x 30x20x0.3 cm plexi-glass sheets | ||
* 1x M6 threaded rod | * 1x M6 threaded rod | ||
| Line 41: | Line 41: | ||
* 12x M6 wide-washers | * 12x M6 wide-washers | ||
The final build took a few hours to complete. I used a sheet of plexi-glass I already had laying around, that's the reason for the extra holes on the sheet. | The final build took a few hours to complete. I used a sheet of plexi-glass I already had laying around, that's the reason for the extra holes on the top sheet. | ||
[[Image:Solar_power_stand_front.jpg|300px]] [[Image:Solar_power_stand_back.jpg|300px]] [[Image:Solar_power_thread_top.jpg|135px]] | [[Image:Solar_power_stand_front.jpg|300px]] [[Image:Solar_power_stand_back.jpg|300px]] [[Image:Solar_power_thread_top.jpg|135px]] | ||
[[Image:Solar_power_stand_side.jpg|300px]] [[Image:Solar_power_stand_side_closeup.jpg|135px]] | [[Image:Solar_power_stand_side.jpg|300px]] [[Image:Solar_power_stand_side_closeup.jpg|135px]] [[Image:Solar_power_stand_side_topdown.jpg|135px]] | ||
Plexi-glass is so fun to photograph, the cut edges always light up. | |||
== References == | == References == | ||
* [http://en.wikipedia.org/wiki/Nickel-metal_hydride_battery Nickel-metal hydride battery] | * [http://en.wikipedia.org/wiki/Nickel-metal_hydride_battery Nickel-metal hydride battery] | ||
Latest revision as of 15:57, 6 August 2012
Small project to demonstrate solar power, power storage in batteries, and a motor load to spin a propeller.
Parts
Bill of materials (BOM):
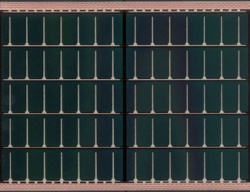
- 2x PowerFilm MPT6-150 6.0V 100mA photovoltaic modules - maximum output 200mA
- 1x Low Voltage Schottky 1A diode
- 4x Varta HR6 NiMH 2100mAh 1.2V batteries
- 1x Battery Holder HR6 - four 1.2V equals 4.8V
- 1x Standard 030 form-factor RM1A 4.7V 150mA 7400rpm motor
- 1x Propeller 3.4"
Alternatives:
Setup
The twin solar panel is providing 4.8Volt 200 mA power, the battery 4.7Volt 1600mAh, and the motor a 4.7Volt 150mA load.
NiMH (Nickle-metal hydride) batteries should normally be charged at 1/10C rate, e.g. 1600/10, 160mA. That means it will take little over 10 hours to charge 1600mA. Trickle-charging at this rate will not overcharge and damage the battery (more). NiMH is not like LiPo batteries where the voltage can be used for cut off. With maximum 200mA from the solar modules, it should be charged in 1600/200, 8 hours. That's about the average length of daylight. Also, charging requires a higher voltage, 6V to charge a 4.8V battery.
If the motor is only used at night and free spinning, it should be able to spin 1600/150, 10.5 hours.
A diode will block the current from the battery to flow back to the solar modules when the sunlight is not bright enough to charge the battery.
Stand
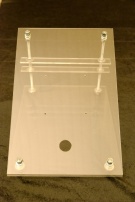
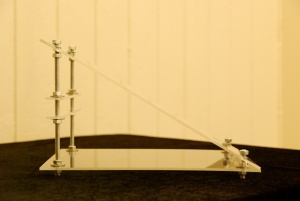
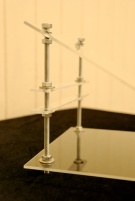
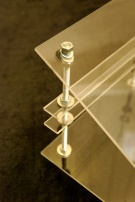
To house all the components, I built a stand out of two sheets of plexi-glass, a threaded rod, a few nuts and washers.
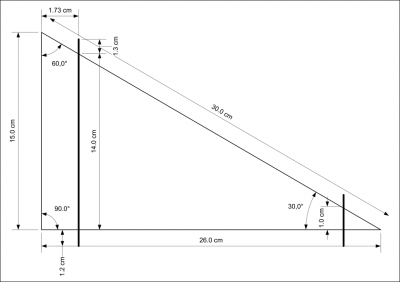
Solar modules like to face the sun (for some reason) and a 90-60-30 degree triangle should work fine to tilt it in the general direction of the sun on daytime. The modules would be fastened on the hypotenuse between the 30 and 60 degree angles. Pythagoras helped to figure out the correct measurements.
Drawing and measurements:
You can download the hand sketches here.
Bill of materials (BOM):
- 2x 30x20x0.3 cm plexi-glass sheets
- 1x M6 threaded rod
- 18x M6 nuts
- 4x M6 washers
- 12x M6 wide-washers
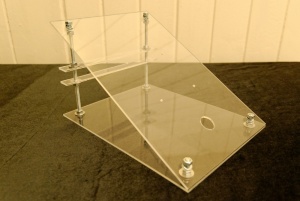
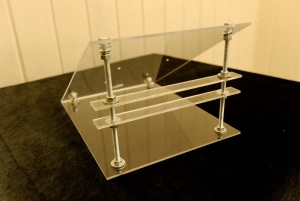
The final build took a few hours to complete. I used a sheet of plexi-glass I already had laying around, that's the reason for the extra holes on the top sheet.
Plexi-glass is so fun to photograph, the cut edges always light up.
