ATmega128 external clock recovery: Difference between revisions
From ivc wiki
Jump to navigationJump to search
(→Fix) |
(→Fix) |
||
| (2 intermediate revisions by the same user not shown) | |||
| Line 2: | Line 2: | ||
== Fix == | == Fix == | ||
To recover the micro with stuck in "External clock" mode, is to connect a 1-3MHz function generator to pin 24 on the ATmega128. The | To recover the micro with stuck in "External clock" mode, is to connect a 1-3MHz function generator to pin 24 on the ATmega128, here it's another micro. The ATmega128 should then be possible to program and boot normally on the next power cycle. | ||
=== Connection === | === Connection === | ||
| Line 18: | Line 18: | ||
# The micro is now recovered and the external clock can be removed, reset to try | # The micro is now recovered and the external clock can be removed, reset to try | ||
[[Image:ATmega128_external_clock_spi_speed.png| | [[Image:ATmega128_external_failed.png|200px]] [[Image:ATmega128_external_clock_spi_speed.png|200px]] [[Image:ATmega128_external_clock_recovery_restore.png|200px]] [[Image:ATmega128_external_clock_recovery_success.png|200px]] | ||
=== Function generator === | === Function generator === | ||
Latest revision as of 18:28, 7 April 2011
If you accidentally programmed the Fuses to use the "External Clock" instead of "External crystal" in the SUT_CKSEL setting, the microcontroller is temporarily rendered useless.
Fix
To recover the micro with stuck in "External clock" mode, is to connect a 1-3MHz function generator to pin 24 on the ATmega128, here it's another micro. The ATmega128 should then be possible to program and boot normally on the next power cycle.
Connection
- Remove the crystal and the capacitor connected to pin 24, named XTAL1.
- Get another ATmega based microcontroller, I used a Arduino Uno with an ATmega323, download and program it with the code below
- Connect the other micro by connecting ground to ground on the ATmega128, usually pins 53 or 22,
- And connect PD3, digital pin 3 on Arduino Uno, to pin 24 on the ATmega128, check the datasheet to find the correct pin
- Connect the AVR programmer, I used a USBTinyAVR programmer that mimics the official AVRISP programmer
Program
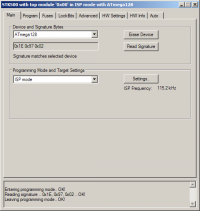
- Open AVR Studio 4 and click the program icon in the tool bar to initialize a connection, select AVRISP and Auto, or the correct type and port for the programmer
- Once connected to the programmer, set the ISP speed to around 100-125kHz, I have 112.5kHz, click write
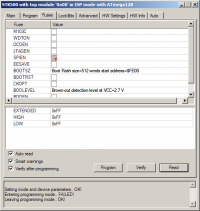
- If the entering programming fails, as it usually does, try resetting the other controller and the ATmega128, on that order
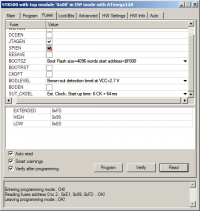
- Once the programming mode is successful, go to the Fuses tab, unpick CLOPT if selected, and pick "Int. RC Osc. 1MHz; Start-up time: 6 CK + 64 ms", click program
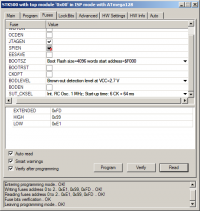
- The micro is now recovered and the external clock can be removed, reset to try
Function generator
Arduino
Paste into the Arduino editor, compile and upload.
void setup()
{
    cli();
    DDRD = 0xff;
}

void loop()
{
 while (1) {
   // uncomment the delay and comment out cli() to try with a led to find the correct pin
   PORTD |= 0x8;
   //delay(100);
   PORTD &= ~0x8;
   //delay(100);
 }
}
AVR
Untested code, but it should work fine, compile and upload in AVR Studio or Eclipse.
#include <avr/io.h>
void main(void)
{
 cli();
 DDRD = 0xff;
 while (1) {
  PORTD |= 0x8;
  PORTD &= ~0x8;
 }
}


