IPhone Share Internet: Difference between revisions
| Line 57: | Line 57: | ||
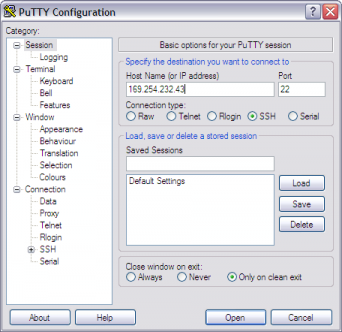
Open a new session and type the IP address from the iPhone in the ''Host Name (or IP address)''-field. | Open a new session and type the IP address from the iPhone in the ''Host Name (or IP address)''-field. | ||
[[Image:Iphone share putty newsession.png]] | [[Image:Iphone share putty newsession.png|342px]] | ||
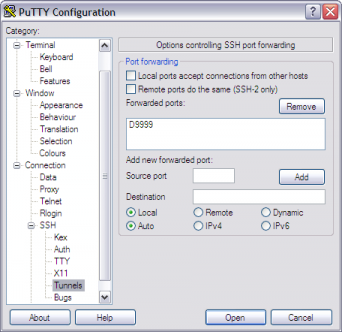
Next, go to the ''Connections'', ''SSH'', and ''Tunnels'' screen. Add a new forwarded port, first select ''Dynamic'' destination, and then enter a random port number in the ''Source Port''-field, e.g. 9999, leave ''Destination''-field empty, and click ''Add'' to add the new entry to the list. | Next, go to the ''Connections'', ''SSH'', and ''Tunnels'' screen. Add a new forwarded port, first select ''Dynamic'' destination, and then enter a random port number in the ''Source Port''-field, e.g. 9999, leave ''Destination''-field empty, and click ''Add'' to add the new entry to the list. | ||
[[Image:Iphone share putty tunnel.png]] | [[Image:Iphone share putty tunnel.png|342px]] | ||
Now, before clicking ''Open'', save the session in the ''Sessions'' screen. Enter a name and press ''Save''. The next time, just select the saved session to bring up the tunnel. | Now, before clicking ''Open'', save the session in the ''Sessions'' screen. Enter a name and press ''Save''. The next time, just select the saved session to bring up the tunnel. | ||
Revision as of 02:43, 27 March 2008
It's possible to share the EDGE connection on the iPhone using the Wifi connection as a tunnel.
Setup Ad-Hoc Network
The iPhone and laptop can be connected directly using an Ad-Hoc network. This can easily be set up in Windows.
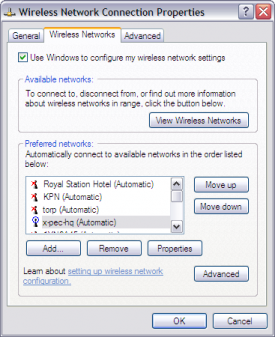
Open the wireless network adapter properties, click the 'Wireless Networks'-tab.
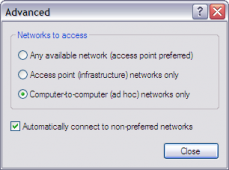
At the bottom, to into the 'Advanced' settings, and select Computer-to-computer (ad hoc) networks only.
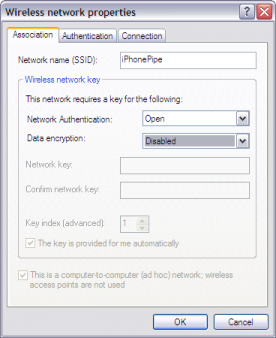
Now, add an ad-hoc network by clicking Add, typing a SSID like iPhonePipe, and selecting Disable in the data encryption drop-down.
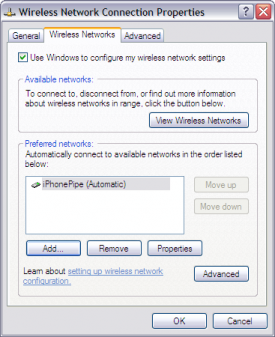
There should be only one network in the Preferred networks list, e.g. iPhonePipe, click Ok to commit the changes.
Configure iPhone
With the ad-hoc network set up, connect the iPhone to the new ad-hoc network.
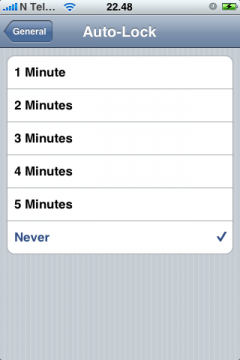
To keep the iPhone from dropping the Wifi ad-hoc connection, disable Auto-lock under Settings, General, Auto-lock, and set it to Never.
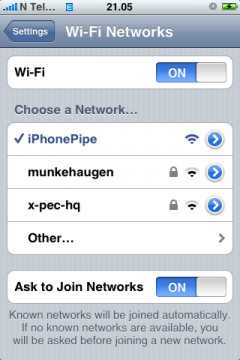
To connect to the ad-hoc network, go to Settings and Wi-Fi, wait a moment for the scan to complete, and select the new ad-hoc network, e.g iPhonePipe
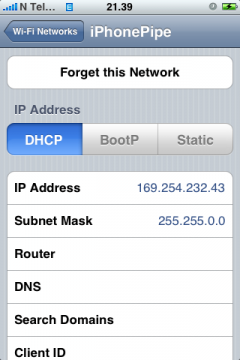
Once the iPhone is connected with a check next to the name, touch the blue arrow to find the pseudo IP address for the iPhone connection. It's recommended to set a static IP address to avoid clutter later, see next paragraph.
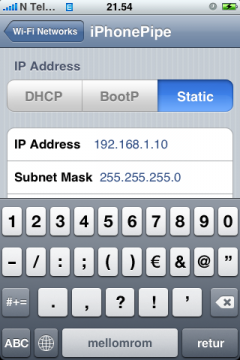
Alternatively, set a static IP address to skip all the refresh and wait for the pseudo DHCP IP to be set.
Next, SOCKS does not allow DNS look ups and the iPhone has to act as a relay or forwarder for DNS queries. I've put together an iPhone applications to easily start and stop a BIND name server.
Extract the Bind.app directory to /Applications, and make the named binary executable and set the SUID bit, chmod +xs named. Also, make FrontEnd.sh executable.
Start the BIND server after the tunnel is active, otherwise the named daemon will refuse incoming queries because the new tunnel interface is unknown. Always stop and start the BIND server if the networks settings has changed.
PuTTY Tunnel
Set up a tunnel via SSH to allow the data requests to be sent to the iPhone end of the ad-hoc connection. The SSH server on the iPhone acts as a SOCKS proxy server.
Open a new session and type the IP address from the iPhone in the Host Name (or IP address)-field.
Next, go to the Connections, SSH, and Tunnels screen. Add a new forwarded port, first select Dynamic destination, and then enter a random port number in the Source Port-field, e.g. 9999, leave Destination-field empty, and click Add to add the new entry to the list.
Now, before clicking Open, save the session in the Sessions screen. Enter a name and press Save. The next time, just select the saved session to bring up the tunnel.
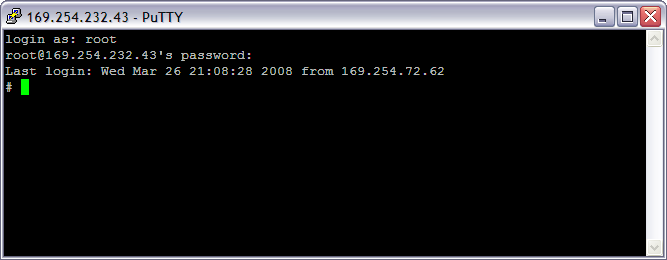
Click Open to start the SSH the connection to the iPhone. Accept the key challenge and login using root as the login. If the password of the jailbroken iPhone hasn't been changed, the password is either alpine or dottie.
If you see a # character and get a command-line, everything is good.
Configure Applications
The Internet sharing only works in programs what allow you to set a SOCKS proxy server, e.g. Firefox, Pidgin, Internet Explorer, MSN Messenger, and more.
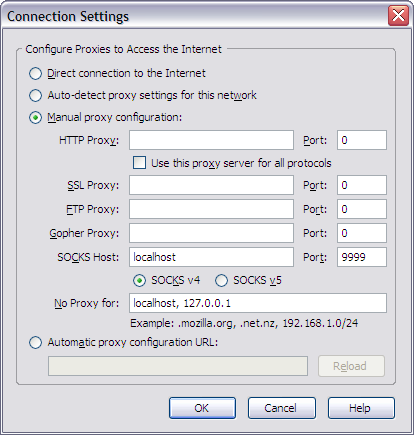
To surf via EDGE using Firefox, change the proxy settings in Options, Advanced, Network, and Settings. Select Manual proxy configuration and at the second to last field, SOCKS Host, enter localhost. The PuTTY client is the local tunnel to the iPhone, and therefore the localhost-address is used when interfacing with the tunnel.
Use the port set as Source Port in PuTTy, e.g. 9999, in the port field.
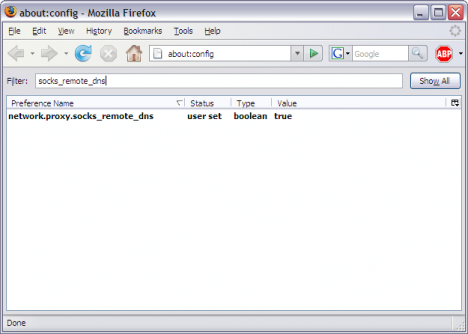
A SOCKS trick for Firefox is to set network.proxy.socks_remote_dns to true to do the DNS resolving over the SOCKS tunnel and not regular TCP/IP connection. In the address bar, enter about:config. Then in the filter bar enter socks_remote_dns and double click the preference to change false to true. Re-open Firefox. If you get unable to connect messages, try to set the setting to false and start the BIND name server on the iPhone.
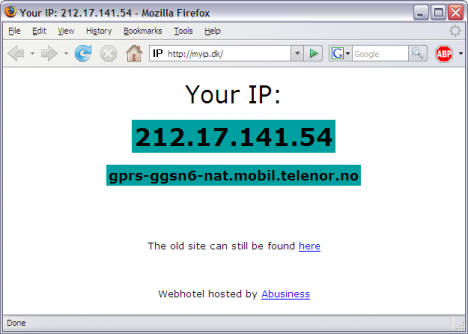
Now, try to open www.google.com and www.myip.com, and if it doesn't load as fast as normal you know you're on EDGE. :)
Troubleshooting
If you encounter problems, as you probably will, try to re-initialize the step-by-step process.
The iPhone has a tendence to drop the data connections when idle, try to open Safari on the iPhone to bring up the EDGE connection. An E should show in the systray when both the tunnel and EDGE connection is active and ready, a Wifi icon means the EDGE connection is dropped.
Try to reload the BIND server is you can't ping yahoo.com or resolve hostnames.
Revert Settings
When you want to connect to a regular wireless access point, in the wireless network properties, set Advanced to Any available network and the TCP/IP settings to Obtain an IP address automatically.
On the iPhone, just select the network you wan to join and stop the BIND server.
